Marta's Homemade Cuban Churros Recipe

Making a Memory

My kids were all born here in Southern California. My husband is also a native Californian. So the only kind of churros they've ever known have come from a cart at Disneyland.

Churro cart at Disneyland

But those are Mexican-style. They are hard and crunchy with lots of brown sugar. They are tasty enough, but I am used to light and fluffy Cuban-style churros.  

Oh, yeah!

The kind you can have for breakfast with Café con Leche, or on a cold night with Chocolaté Caliente.

It was unseasonably cold here yesterday, which seemed like a perfect time to make churros.

Jonathan, especially gets such a kick out of this.  Some foods, he believes, can only be made in restaurants or found in grocery stores.

So, when I get an urge to make home-made potato chips or something that usually comes packaged, he responds with:  "Mom, that's so . . . pro."

When I served the "Vaca Frita" for dinner. Eric said, "Honey, this is a gourmet meal."

I take the compliments and refrain from the lecture about how important the entire process is.  My own childhood was filled with memories of food and family and the kitchen and conversation.  It is part of my very Cuban DNA.  It's not just about getting food on the table. It's not about convenience and speed, (although, this particular recipe is super simple and only takes a few minutes) but about the pleasure of working side by side.  It's about the aromas and tastes that affect memory.  It's about laughing together.  It's about making the memory.

But I know that this is something that is more "caught, than taught."  And I continue to feed them in my "pro and gourmet" way, because later in life I know they will say, "My mom made the BEST churros!"

And I know they won't be able to remember which was really better: the churros themselves, or the fun we had preparing them. 

And it really won't matter. =D

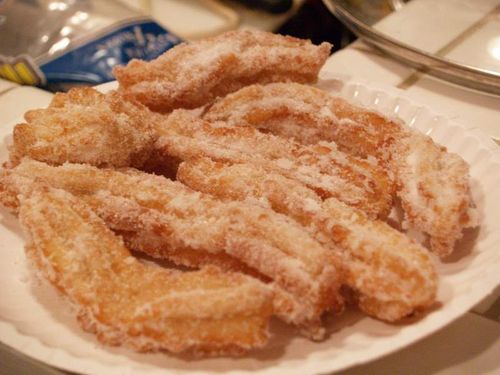
Marta's Homemade Cuban Churros Recipe

Marta's Homemade Churros

Ingredients:

  • 1 cup (all-purpose) flour
  • 1 cup water with 1/8 tsp. of salt
  • vegetable oil
  • Plate of granulated or powdered sugar

1) Sift the flour in a mixing bowl, while bringing the salted water to a boil.

2) Pour the boiling water over the flour, stirring lightly until the dough forms into a ball - about 30 seconds. The dough should be compact, but not runny or too soft.

3) If you have a churrera or a cookie press, load it up with the dough. If not, a big freezer zip lock or a pastry bag with a corner cut off works, too.  Use a star shaped tip, if you have it.

4) Squeeze dough onto waxed paper in about 6 inch strips.

5) Heat the oil until very hot.

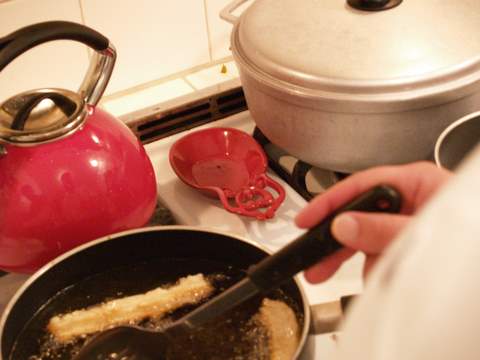
Cooking churros
Cooking churros

6) Fry the dough in the super-hot oil, turning once when you see the edges barely begin to pick up color. (think pancakes) Fry for about 5 minutes total.

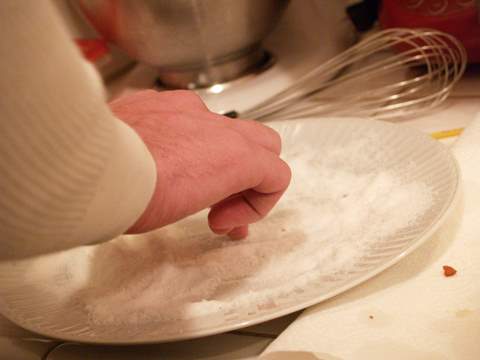
7) Remove with a slotted spoon, draining as much oil as possible and place on the sugar plate and roll in the sugar.

Rolling churros in sugar

8) The churros will be ready to eat almost immediately.

9) The memory will last forever. ;-)
Cuban Crema de Vie Recipe - A Toast!

In the first few years of my family’s exile, we still had high hopes that that whole pesky revolution nonsense would quickly blow over. Every year around the holidays we would make our Cuban egg nog, which we call Crème de Vie (or Crema de Vie - “the cream of life”).

Every year we would raise our glasses at our Nochebuena celebration and toast:

“El año que viene estamos en Cuba.” 

My family continued hoping and toasting year after year after year.

And time marched forward.

We grew up.

We assimilated.

We married.

We had children.

My parents grew old.

My dad passed away.

Every year during the holidays we make the Crème de Vie.

So much life has happened, and so many years and hopes have come and gone and still we toast:

“Next year we’ll be in Cuba.”

The toast has taken on a life of its own even though it has lost much of its original meaning. But we continue to make the Crème de Vie, and we continue to toast. It’s one of my very favorite Cuban Christmas traditions.

I just made the first batch of Crème de Vie for this holiday season. My daughters helped make and bottle it and, of course, we had to try it. I was about to recite the usual toast, when a new and unexpected hope clutched at my heart and brought tears to my eyes.

I raise my glass to you all with this toast:

“Cambio.”

Crema de vie
Crema de vie

Crème de Vie (Cuban Egg Nog) Recipe

  • 1 can sweetened condensed milk
  • 1 can evaporated milk
  • 6 egg yolks
  • 2 cups sugar
  • 1 cup water
  • 1 tsp. vanilla
  • ½ cup white rum

1) Mix the sugar and water together over very low heat, stirring constantly until the sugar dissolves – about 3 minutes. It has to be just low enough so that the sugar doesn’t carmelize, but makes a thick sugary water.

2) Put the egg yolks in a blender and mix with the condensed milk.

2 crema de vie leche condensada

3) Slowly add the evaporated milk and mix completely.

4) Flavor with the vanilla.

5) Pour the mixture into the sugar-water and mix together.

6) Finally stir in the rum (as a preservative. =D)

3 crema de vie bottles

Makes about 5 cups, or two and a half bottles. 

Salud!

// <![CDATA[ var pfHeaderImgUrl = '';var pfHeaderTagline = '';var pfdisableClickToDel = 0;var pfHideImages = 0;var pfImageDisplayStyle = 'right';var pfDisablePDF = 0;var pfDisableEmail = 0;var pfDisablePrint = 0;var pfCustomCSS = '';var pfBtVersion='1';(function(){var js, pf;pf = document.createElement('script');pf.type = 'text/javascript';if('https:' == document.location.protocol){js='https://pf-cdn.printfriendly.com/ssl/main.js'}else{js='http://cdn.printfriendly.com/printfriendly.js'}pf.src=js;document.getElementsByTagName('head')[0].appendChild(pf)})(); // ]]</p></div>

A Match Made in Heaven. Flan + Cake = Flan Cake Recipe

I’m always on the look out for fabulous new recipes. The ideal recipe, whether for a main dish or a dessert, is something that is simple to make but looks complicated and is a little breathtaking. It should at the very least inspire ooohs and aaahs.

This recipe is simple, delicious, and yummy-noise inspiring.

Wait until I tell you what it is….

Flan.Cake. (I know. Shut up.)

The recipe was originally posted by my blog-friend, Anne Marie of What’s Cookin’ in Mia fame. Of course, I added a few small touches of my own because I thought they would make the Flan Cake (Flan Cake, people!) taste better (and I was right, but that’s not important right now).

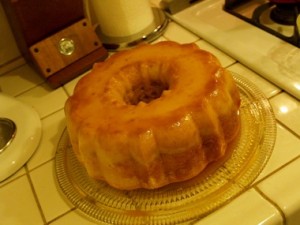
Flan-cake-300x225
Flan-cake-300x225

Flan Cake Recipe

  • 1 yellow cake mix (prepared according to directions on the box – check to see if you need extra eggs or oil for this.)
  • 1/4 cup caramel topping (I like the Hershey’s brand for this, the kind you’d pour over ice cream)
  • 4 eggs, lightly beaten
  • 1 can sweetened condensed milk
  • 1 large can evaporated milk
  • 1 Tbsp. Vanilla extract
  • Ground cinnamon

1. Preheat the oven to 350 degrees.

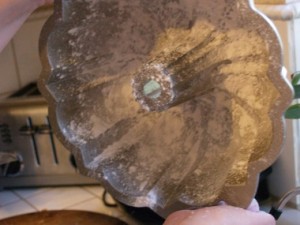
2. Grease and flour a large Bundt pan.

Preparing-the-pan-300x225

3. Prepare cake mix according to package directions.

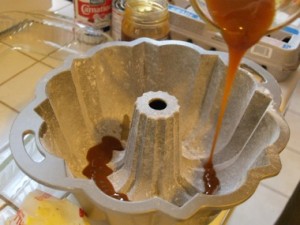
4. Pour the caramel topping around the bottom of the Bundt pan.

Pouring-caramel-300x225

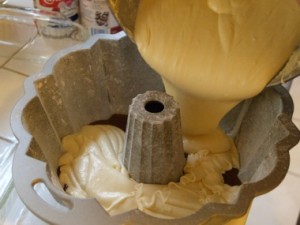
5. Pour cake mix over caramel.

Pouring-batter-300x225

6. In a blender, mix together well: eggs, sweetened condensed milk, evaporated milk, and vanilla extract.

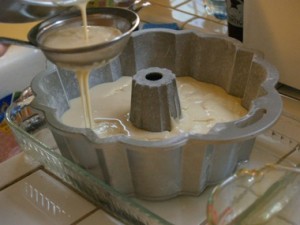
7. Sift and pour gently over cake mix in the Bundt pan. (You’re sifting out any large pieces of the egg.)

Sifting-egg-300x225
Sifting-egg-300x225

8. Sprinkle with cinnamon.

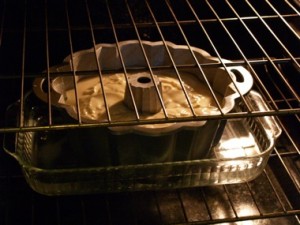
9. Place filled Bundt pan in a 9×13 pan filled with hot water about 1 1/2 to 2 inches up the side of the Bundt pan.

Baking-in-water-bath-300x225

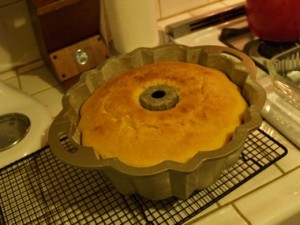
10. Bake (in the water bath) one hour at 350 degrees. It should be slightly golden brown. Test for doneness by inserting toothpick in the cake. If it comes out clean, it’s done.

11. Remove from water bath and cool 10 to 15 minutes.

Cooling-300x225
Cooling-300x225

12. Invert onto a cake plate. The caramel will still be runny – it’s supposed to be to melt over the cake, so be careful when inverting! Refrigerate for at least an hour before serving.

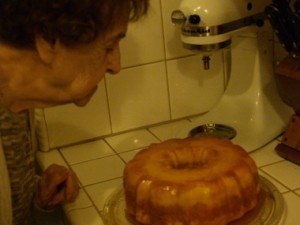
This is my Professional Flan Inspector, my 95 year old mom who’s been making flan for 60 years. The Flan Cake blew her away. Find yourself your very own Flan Inspector. Trust me, they’ll be impressed. =D

Inspector-300x225
Inspector-300x225

My Big, Fat, Cuban Family Torrejas Recipe with Guava and Cream Cheese Stuffing

Family: “Yay! Guava paste and cream cheese! You’re making Refugiados, aren’t you?”

Me: “Good guess. No. I’m making This-Up-As-I-Go.” =D

Torrejas 1
Torrejas 1

If there is anything we Cubans love more than our coladitos 12 times a day, it is a new use for guava. Preferably with cream cheese.

I decided to do a brunch for my family.

So I decided I’d make "torrejas." (a type of Cuban French Toast)

And then I had A Thought.

What if I STUFFED them with guava and cream cheese?

Oh, Baby!

Torrejas2
Torrejas2

My Big, Fat, Cuban Family Torrejas Recipe

  • 4 egg yolks
  • 1 cup whole milk
  • 2 Tbsp. Sugar
  • 1 tsp. Cinnamon
  • 1 tsp. Vanilla extract
  • 3 whole eggs, beaten
  • Vegetable oil (for frying)
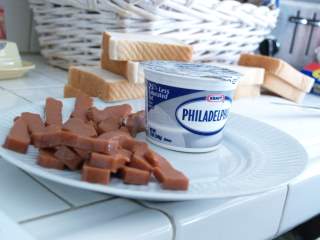
  • Guava paste cut into (about 20) slices
  • 12 oz. tub of cream cheese
  • 8 slices of thick bread. (I found something called Texas Toast – extra thick bread, but pan Cubano works well too)
  • Powdered sugar

1) Whisk together: the egg yolks, milk, sugar, cinnamon, and vanilla. Mix thoroughly and set aside.

2) In a separate bowl, whisk together the 3 whole eggs.

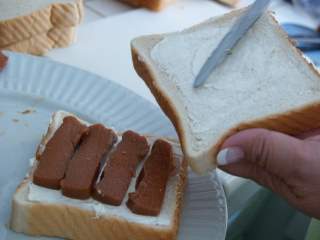
3) Spread each slice of bread generously with the cream cheese.

4) Place about 4 or 5 slices of the guava paste on the bread to make a sandwich.

Torrejas3
Torrejas3

5) Heat the oil in a large frying pan or griddle. (use enough to just cover the surface)

6) Create an “assembly line” – quickly dip the sandwiches in the egg/milk/cinnamon mixture.

7) Take the soaked sandwich and dip into the beaten egg mixture. 

8) Fry these in the hot oil – just until brown, turning once.

Torrejas4
Torrejas4

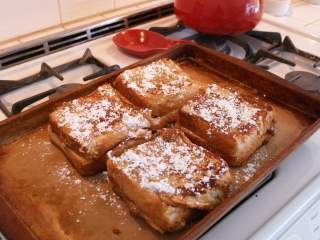
9) Place the fried sandwiches in a baking dish and place in a hot oven 400° for about 10 minutes, or just until the guava melts.

10) Dust with powdered sugar and slice into quarters. (Or halves if you think you can handle it. =D)

Torrejas5
Torrejas5

The MBFCF Torrejas can be eaten hot or cold. I prefer the hot, fresh taste of melted guava.

Added plus: because of the gooey, melted guava they don't even need syrup!  Serve with a sweet, hot cafecito.

“De aqui pa’l cielo.”  ;-)
// <![CDATA[ var pfHeaderImgUrl = '';var pfHeaderTagline = '';var pfdisableClickToDel = 0;var pfHideImages = 0;var pfImageDisplayStyle = 'right';var pfDisablePDF = 0;var pfDisableEmail = 0;var pfDisablePrint = 0;var pfCustomCSS = '';var pfBtVersion='1';(function(){var js, pf;pf = document.createElement('script');pf.type = 'text/javascript';if('https:' == document.location.protocol){js='https://pf-cdn.printfriendly.com/ssl/main.js'}else{js='http://cdn.printfriendly.com/printfriendly.js'}pf.src=js;document.getElementsByTagName('head')[0].appendChild(pf)})(); // ]]</p></div>

How to Make Cuban Coffee - The Perfect Blend

If there’s one thing Cubans know how to do well (besides dancing and cooking and arguing, but that’s not important right now =D), it’s how to make the Best Coffee on This Earth.

Seriously, every Cuban home I was lucky enough to have been a guest in, served the most delicious, practically perfect, just-sweet-enough-with-the-perfect-amount-of-“espumita” cup of Cuban coffee. But more than that, what I absolutely loved was that every single person who made the coffee prided themselves in their creation. And in every home there’s always the One Person who gets asked to make the coffee because they just “know” how to make it right.

So today, because I love you and I know what’s good for you, I am going to share with you the Perfect Blend of art and science, which will produce that just-sweet-enough-is-there-anything-better-than-this? -God-I-love-being-Cuban cup of Café Cubano.

And as much as I hate to admit it, in my house, I’m not The Coffee Maker. My daughter, Amy Kikita is. Which makes us The Perfect Blend: I cook the meal. She makes the coffee.

See what I mean? Perfect. 

How to Make Cuban Coffee

You will need:

Stovetop espresso maker

Cuban-style coffee (Bustelo, Pilon, La Llave – available here)

Sugar

Glass or metal pitcher

Demitasse cups

1) Fill the bottom of the espresso maker with water - just to the valve.

How-to-make-cuban-coffee-1

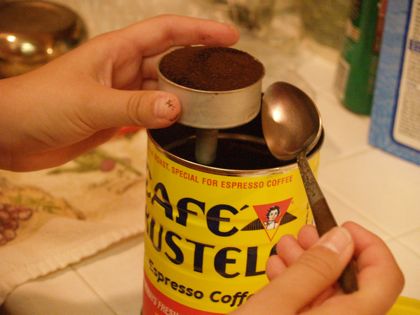
2) Fill the strainer with Cuban-style coffee until it’s packed in well.

3) Screw the top on tightly.

How-to-make-cuban-coffee-2

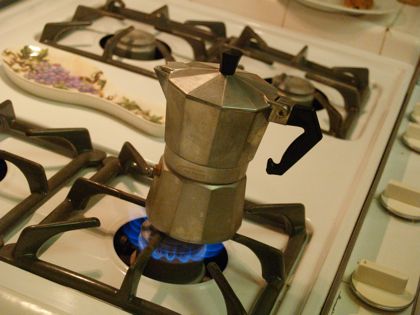
4) Place on the stove, over medium flame, slightly to one side, so you don’t accidentally burn the plastic handle.

How-to-make-cuban-coffee-3

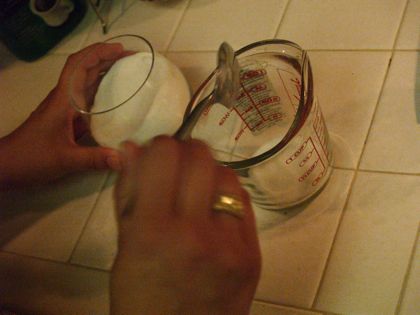
5) Place sugar by tablespoon in the glass (or metal) pitcher – the ratio is one Tablespoon of sugar per TWO demitasse cups. Remember we like our cafecito SWEET.

How-to-make-cuban-coffee-4

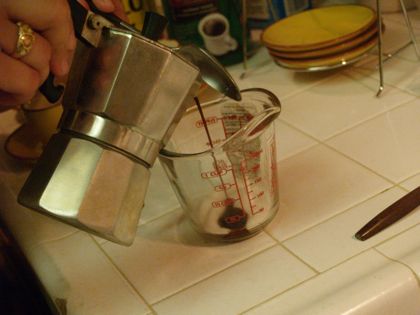
6) When the coffee just begins to brew, remove from heat and pour a little bit into the pitcher with the sugar.

7) Place coffee pot back on the heat to finish brewing.

How-to-make-cuban-coffee-5

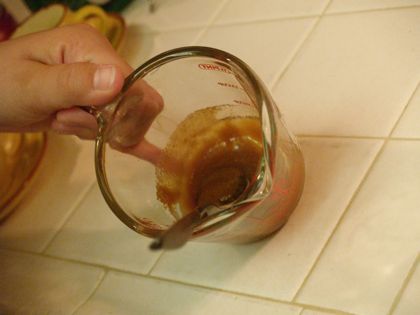
8) Meanwhile, stir the sugar/coffee mixture quickly until the bit of coffee melts down the sugar and you get it nice and frothy. (this is your espuma!)

How-to-make-cuban-coffee-6

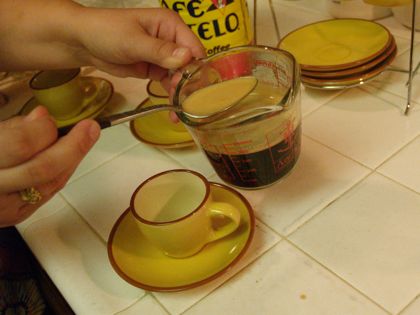
9) Pour the rest of the coffee into the sugar mixture and stir. Very gingerly, scoop some of the froth and drop it in each cup.

10) Then very carefully pour the finished coffee into the cups making sure you don’t damage the espuma.

11) Sit back and enjoy. Not just the coffee, but if you’re The One, receive the compliments graciously. Smile, Look down. Blush if you can manage it.

And say, “it was my pleasure.” And mean it. 

Marta's Homemade Pastelitos de Guayaba Recipe

My husband is an Internet Marketing Guy. (He prefers to be called “The Marketing Guru,” but that’s not important right now.) He tells me search engine facts like: “Your site has had X number of hits today.” This information totally makes me feel cool, although I’m a little puzzled by how it is that people are finding me.

He patiently explains: “They’re Googling Cuban things.”

That sentence right there throws me into spasms of laughter. (Holy cow! Who are these people? Can they be stopped? I crack myself up.)

When I finally catch my breath again (and he stops frowning) he goes on to let me know that people are searching for “keywords” such as: Cuban family, Cuban-American life, and even “Kevin Bacon to Andy Garcia.”

But apparently, the “Cuban thing” that people are Googling the most and which most often leads them toMy big, fat, Cuban family is (drum roll please). . . “pastelitos de guayaba.”

“My pastelitos are getting Googled?”

Yikes! That means that all of cyber-space knows that I’m just a cheater and a poser.

Or . . . (as The Marketing Guru spins it) I’m just a Smart Cuban Cook living in a pastelito-challenged location. (phew!)

God, I love that man.

Pastelitos 5
Pastelitos 5

Marta’s Homemade Pastelitos de Guayaba Recipe

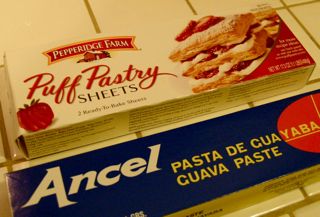
  • 1 pkg. Pepperidge Farm Puff Pastry Sheets
  • 1 bar guava paste
  • 1 pkg. Cream cheese (optional)

1) Preheat oven to 400 degrees.

2) Thaw the puff pastry according to package directions.

Pastelitos 1
Pastelitos 1

3) Use baking parchment to line your cookie sheet so the guava won’t stick.

4) Unfold one of the pastry sheets and place on pan.

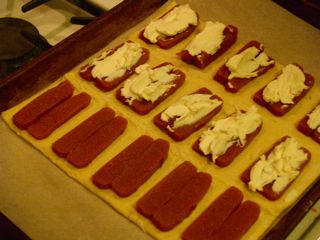
5) Cut guava into 1/4 inch slices and place on the pastry sheet.

6) Spread cream cheese over guava paste slices (optional).

Pastelitos 2
Pastelitos 2

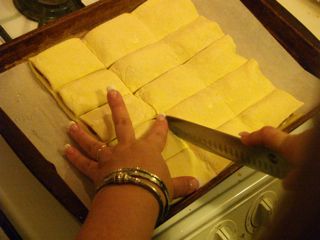
7) Unfold second pastry sheet and place on top of guava paste. 

8) Cut to desired size before baking.

Pastelitos 3
Pastelitos 3

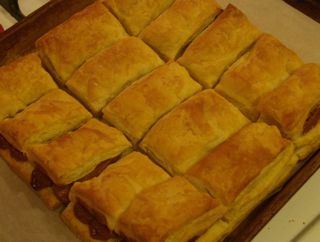
9) Bake at 400 for 25 to 35 minutes or until golden brown.

Pastelitos 4
Pastelitos 4

10) They will look absolutely irresistible, but (seriously, trust me on this) use as much self-control as you can muster and give them time to cool before taking that first bite.

(originally posted on Babalú blog - April 2008)

Turkey with Port Wine Guava Glaze (Yes, GUAVA!)

Hi all!

It's a special Monday, Pre-Thanksgiving Edition of Marta's Cuban American Kitchen.

I have been trying, without much success, to declare November "National Guava Month." Sadly, no one seems to take me seriously about this, but that's not important right now.

So, I'm going to try again today.

I, Marta, hereby declare November to be "National Guava Month."

In honor of National Guava Month, (<--it's got a nice ring to it, don't you think?) I'll be sharing two guava recipes in the next two weeks.

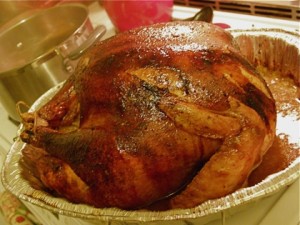
Today to kick off the Guava Celebration, I'm making a turkey with a Port Wine Guava Glaze. (You just drooled on yourself. Admit it.)

Happy National Guava Month! (I cannot think of one downside to this. It's going to be epic.) =D

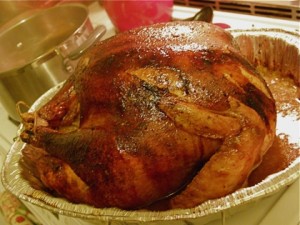
Turkey-300x225
Turkey-300x225

Port Wine Guava Glaze

  • 1 large turkey (mine was 20 lb.)
  • 2 cups port wine
  • 1 cup red wine vinegar
  • 1 can (8 oz.) guava marmalade or frozen guava puree
  • 8 oz. guava paste
  • 4 star anise
  • 1 cinnamon stick
  • 5 cloves
  • 8 bay leaves
  • 20 black peppercorns
  • Fresh thyme - divided
  • 1 large onion
  • 2 heads of garlic
  • Fresh lemons
  • Salt and pepper
  • 2 sticks of butter
  • Dry white wine

1. Preheat oven to 350 degrees.

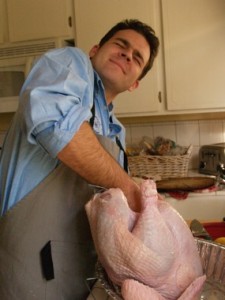
2. Remove the giblets from the turkey and rinse with cold water, inside and out. Pat dry.

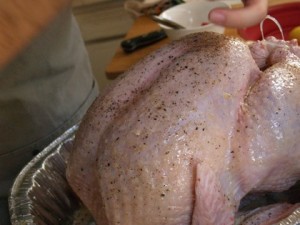
Rub-with-lemon-225x300

3. Rub the inside and outside with lemon and sprinkle salt liberally inside the turkey.

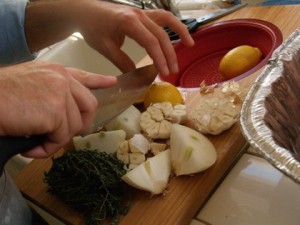
4. Roughly cut up the onion, garlic, and lemons and stuff them into the cavity of the turkey. This is done to add flavor, not as a stuffing, per se.

Chopped-ingredients-300x225

5. Melt 1/2 stick of butter and baste the entire turkey.

6. Sprinkle liberally with salt and pepper.

Sprinkle-with-salt-pepper-300x225

7. Place the turkey into a roasting pan and begin the roasting. Cook for 45 minutes at 350 degrees so that it starts to brown while you prepare the glaze.

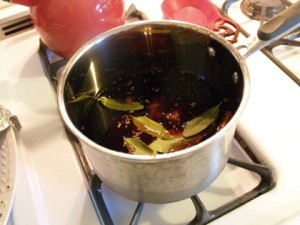
8. For the glaze, place all ingredients, except thyme, in a saucepot and bring to a boil.

Mix-glaze-300x225
Mix-glaze-300x225

9. Reduce heat and simmer, stirring gently to help dissolve the guava paste.

10. Cook glaze on low heat until thickened, approximately 20 minutes.

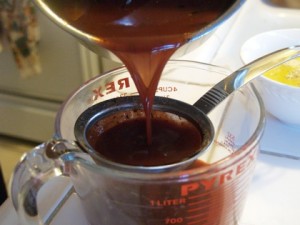
11. Remove from heat and add a few sprigs of thyme. Let it stand for 15 minutes to cool and to infuse the flavor. Strain.

Strain-300x225
Strain-300x225

12. Divide glaze in half, and set aside one half for the serving table.

13. Mix the first half with 6 Tbps. melted butter, 1 cup of dry white wine, and salt and pepper to taste. This is your baste.

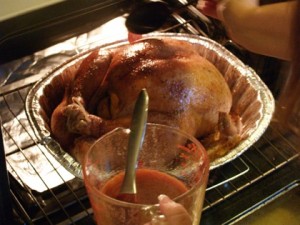
14. After the bird has cooked for about 45 minutes, begin your basting. Pour some glaze over the turkey and brush on.

Baste-with-glaze-300x225

15. Baste frequently, about every 10 to 15 minutes or so.

16. When the bird starts to darken (and it will) tent it with aluminum foil brushed with butter.

17. Cooking time depends on the size of the turkey. About 3 hours for a 12-15 pound bird and about 4 1/2 for a 20 lb. bird.

18. Always check for doneness using a meat thermometer. Temp should reach 180 in the thigh and 170 in the breast.

19. Remove turkey from the oven and let it rest, covered with foil, for about 20 minutes.

20. Carve, slice and serve the beautiful bird with the heated table sauce served along side.

Turkey-300x225
Turkey-300x225

Let the National Guava Month Celebrations begin! ;-)
(originally posted on Babalú blog - November 2009 & Tiki Tiki Blog - November 2009)
Cuban Ropa Vieja Recipe In A Slow Cooker

When we arrived in Miami in the early 60’s, we barely had enough money to cover basic expenses. As you can imagine, rent, utilities, and food dominated the budget. Because we left Cuba with just the suitcases we could carry, we were glad to receive donated clothing. We were grateful for other people’s cast-offs. My parents especially appreciated the charity. I don’t think they could have managed otherwise. Trying to clothe five daughters on a ship welder’s hourly wage? Impossible.

But then, something amazing happened. My dad finally found a job in his field, which was engineering. He began working in early spring, so that by Easter, my mom made the announcement that we were going to buy new clothes for Easter.

Seriously, this was an Easter Miracle. And although, we had grown used to “making do,” we rose to the shopping occasion like the true Cuban women we are. Dresses, gloves, hats, purses – the works! I confess that every year at this time, I remember the giddy relief of that Blessed Event.

And I continue to be so very grateful that the only “ropa vieja” I have now, I usually eat with white rice. =D

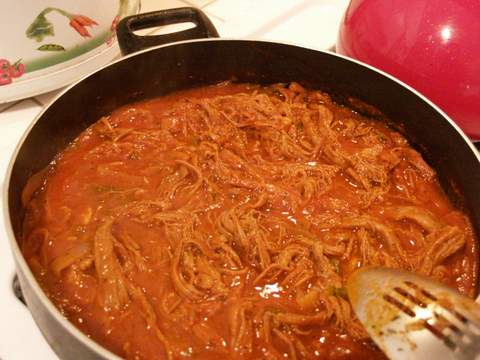
Ropa vieja 1
Ropa vieja 1

Crockpot Cuban Ropa Vieja Recipe

The Meat:

1 ½ - 2 lb. flank steak

½ green pepper, sliced into strips

½ Spanish onion, sliced into strips

2 cloves garlic, peeled and smashed

2 tsp. Salt

2 tsp. Coarse Black Pepper

1/2 tsp. cumin

½ cup red wine

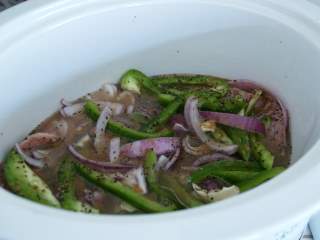
Ropa vieja 2
Ropa vieja 2

1) Put all these ingredients into the crockpot in order. Add water to just cover the steak.

2) Set it on low and cook for 6 to 8 hours.

When the meat is very tender (comes apart with a fork), remove from the crockpot and finely shred it into a separate dish.

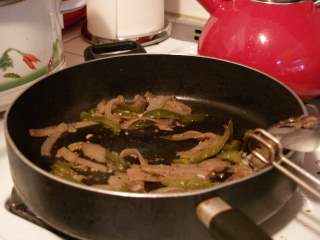
Ropa vieja 3
Ropa vieja 3

The Sauce:

The pepper, garlic, and onion from the crockpot

3 Tbsp. Olive oil

2 cups beef broth

1 small can tomato sauce

1 small can tomato paste

1 tsp. oregano

Salt and pepper to taste

With a slotted spoon, remove the onion, garlic and peppers from the crockpot and sauté in a large frying pan. Add the tomato sauce, tomato paste and beef broth.

Add the shredded beef to the tomato mixture and cook together for about 20 minutes, stirring occasionally.

Serve with white rice.

Buen Provecho!

(originally posted at Babalú blog - April 2007)

Guava Cheesecake Recipe: Move Over, Pumpkin Pie!

So, I’m still on my quixotic quest of declaring November as National Guava Month. To that end, I am happy to share my recipe for Guava Cheesecake in time for you to make it for “El Sanguibin.”

Of course, the main ingredient in cheesecake is cream cheese, which is inexorably tied to Philadelphia (thank you, Kraft Foods). And when you think of Philadelphia, you inevitably think of liberty. At least, I do. (You know, where the Declaration of Independence was signed, the Liberty Bell, Benjamin Franklin and all that…)

But you know…we Cubans love our guayaba con queso crema. (Guava with cream cheese.)

And yes, I know that Thanksgiving is a purely American holiday. But I offer you this thought:

Once you add the guava, the quintessential Cuban fruit of choice, to the oh-so American cream cheese base, it becomes a wonderful representation of us Cuban-Americans.

Therefore, it is my strong belief that Guava Cheesecake should be THE dessert staple of every liberty-loving, Cuban-American family’s Thanksgiving holiday celebration.

Happy Thanksgiving, my guava-and-cream-cheese-loving friends.

Oh yes... and Happy National Guava Month!

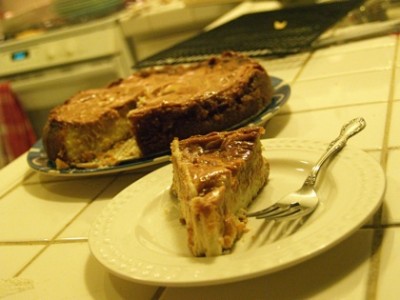
Guava-cheesecake-400x300

Guava Cheesecake Recipe

1 3/4 cups  sugar, divided

1  1/4 cup  graham cracker crumbs

4 Tbsp. butter, melted

Cooking spray

1/2  cup  water

1/2  cup lime juice

8  ounces  guava paste, cut into small pieces (about 1/2 a bar)

5 large egg whites, divided

1/2  cup sour cream

2  (8-ounce) packages cream cheese, softened

1 1/2  tsp.  vanilla extract

1/8  tsp.  salt

1. Preheat oven to 400°.

2. Coat a 9-inch springform pan with cooking spray.

3. In a large bowl, combine 1/4-cup sugar, graham cracker crumbs, and butter. Press mixture into bottom and 1/2 inch up sides of the springform pan.

Press-graham-cracker-crumbs-400x300

4. Bake at 400° for 7 minutes. Cool on a wire rack.

5. Reduce oven temperature to 325°.

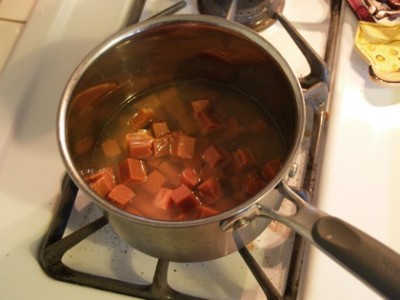
6. Combine 1/2-cup sugar, 1/2-cup water, lime juice, and guava paste in a small saucepan; bring to a boil. Reduce heat, and simmer 5 minutes, stirring occasionally. Cool slightly.

Melting-guava-400x300

7. Pour mixture into a blender, and process until smooth. Cool completely. Stir in 1 of the egg whites.

Guava-in-blender1
Guava-in-blender1

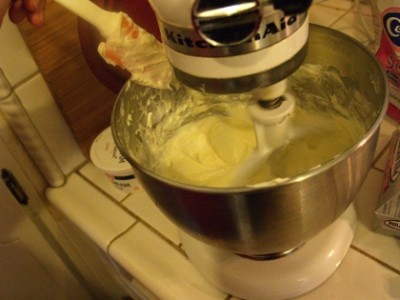
8. Combine remaining ingredients: sugar, sour cream, and cheese in a medium bowl; beat with a mixer at low speed until smooth. Beat in vanilla and salt. Gradually add remaining 4 egg whites, beating well after adding each one.

Cream-cheese-in-blender-400x300

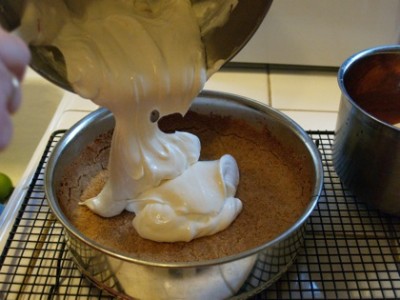
9. Pour cream cheese mixture into prepared pan.

Cheese-mixture-on-crust-400x300

10. Drizzle guava mixture over cheese mixture.

Pouring-guava-on-cheesecake-400x300

11. Swirl them together using the tip of a knife.

Swirl-with-knife-400x300

12. Bake at 325° for 45 minutes or until cheesecake center barely moves when touched. (It may crack a little along the edges.)

13. Turn the oven off; cool cheesecake in closed oven 30 minutes.

14. Remove cheesecake from oven. Run a knife around outside edge.

Guava-cheesecake-in-pan-400x300

15. Allow it to cool to room temperature.

16. Cover and chill at least 8 hours before serving.

// <![CDATA[ var pfHeaderImgUrl = '';var pfHeaderTagline = '';var pfdisableClickToDel = 0;var pfHideImages = 0;var pfImageDisplayStyle = 'right';var pfDisablePDF = 0;var pfDisableEmail = 0;var pfDisablePrint = 0;var pfCustomCSS = '';var pfBtVersion='1';(function(){var js, pf;pf = document.createElement('script');pf.type = 'text/javascript';if('https:' == document.location.protocol){js='https://pf-cdn.printfriendly.com/ssl/main.js'}else{js='http://cdn.printfriendly.com/printfriendly.js'}pf.src=js;document.getElementsByTagName('head')[0].appendChild(pf)})(); // ]]</p></div>

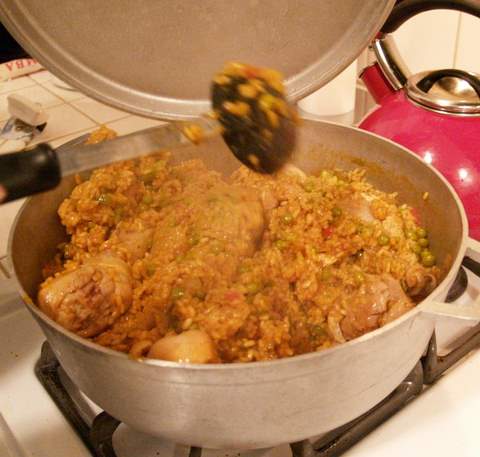
Cuban Arroz con Pollo Recipe de Perez-Puelles

Cuba Nostalgia

Before our lives were turned upside down in 1959, most Sunday afternoons were spent at my grandmother’s house in Havana. We would be dressed impeccably as it was always a special occasion. She found a way to fit everyone - aunts, uncles, cousins - around her table and she usually made Arroz con Pollo. Enough to feed the small army that made up our big, fat, Cuban family.

The fragrance of the saffron, chicken and rice will always be tied to my warmest memories of the abundance of the classic Cuban table. The linens were crisp and white, the silverware polished. The conversation was always boisterous and happy. The feeling of belonging and being cared for always seemed to be evident at that table.

When we left Cuba, the Arroz con Pollo became a special occasion food, served for company and for birthday celebrations. My mom stopped making it altogether a few years ago, but she passed the recipe down to us. Now we maintain the Arroz con Pollo tradition in our home. Every birthday or graduation, every time I want to impress someone, this is what I serve. We make it for dinner on Christmas Day as a change from the lechón that is served the night before on Nochebuena. This is my specialty. It is what I will be serving you when you tell me you’re going to be in Southern California and I insist that you join us for dinner.

My daughter, Amy, always volunteers to cook this now. I have taught her the way my mother taught me, the way my grandmother taught her. Whenever her friends have a birthday celebration, they always put in a request. I think my grandmother would have been delighted by this. She was that way - the more people around the table, the better, or as my husband would say, “That’s so Cuban!” =D

I’ve never been able to find Arroz con Pollo that is as good in any restaurant. Once you try this recipe, I think you’ll agree. To me, it evokes the Cuba of my childhood - Cuba B.C. - a place of warmth and family and of abundance.

Arroz con pollo
Arroz con pollo

Cuban Arroz con Pollo Recipe de Perez-Puelles

  • 2 to 3 lbs. Chicken pieces (I prefer boneless, skinless, breasts, but always include thighs and/or drumsticks with bones and skin – they add to the flavor)
  • 4 cloves of garlic (minced)
  • 1 large onion (diced)
  • 1 bell pepper (diced)
  • 1 small can tomato sauce
  • 1 jar red diced pimientos (reserve a little bit for garnish)
  • 1 can peas (reserve about a third for garnish)
  • 1 can asparagus (cut up)
  • ½ tsp. Salt
  • ½ tsp. Pepper
  • 2 Bay leaves
  • 1 tsp. Cumin
  • 1 tsp. Oregano
  • 2 cups dry white wine
  • 1 cup chicken broth
  • Bitter Orange (powder or marinade)
  • Olive oil
  • 3 cups rice (long grain)
  • 1 tsp. Bijol or Goya Seasoning con Azafran
  • 3 or 4 threads of saffron – crushed (this is optional)
  • 1 - 8 oz. beer

1) Prepare the chicken broth

2) Coat chicken pieces with bitter orange spice or marinade along with the pressed garlic cloves and marinade for about an hour. (not necessary, but it’s awesome if you have the time)

3) Brown chicken in large frying pan in olive oil – remove to a large pot (or cazuela) after they’re browned.

4) To make the sofrito: sauté the onion & pepper in the frying pan (with the bits of garlic and olive oil) until soft, then add tomato sauce, pimientos, peas, asparagus (all with their liquid) salt, pepper, bay leaf, cumin, oregano, wine & broth.

5) Pour in the rice and add the Bijol (or Goya Seasoning) and saffron to color and flavor the rice.

6) Pour all of this over the chicken in the pot.

7) Bring to a boil, then lower to a fast simmer.

8) Cook on medium-low heat for about 40 minutes, then check it and stir it. Rice should be soft and liquid absorbed. If there’s still liquid, keep cooking, checking, & stirring.

9) I like the rice a little soupy, or asopado, so I like to add 8 0z. of beer to the finished product.

10) Pour reserved peas and pimientos as a garnish over the finished arroz con pollo.

I know. I had you at "To make the sofrito...." 

Buen Provecho!

// <![CDATA[ var pfHeaderImgUrl = '';var pfHeaderTagline = '';var pfdisableClickToDel = 0;var pfHideImages = 0;var pfImageDisplayStyle = 'right';var pfDisablePDF = 0;var pfDisableEmail = 0;var pfDisablePrint = 0;var pfCustomCSS = '';var pfBtVersion='1';(function(){var js, pf;pf = document.createElement('script');pf.type = 'text/javascript';if('https:' == document.location.protocol){js='https://pf-cdn.printfriendly.com/ssl/main.js'}else{js='http://cdn.printfriendly.com/printfriendly.js'}pf.src=js;document.getElementsByTagName('head')[0].appendChild(pf)})(); // ]]</p></div>