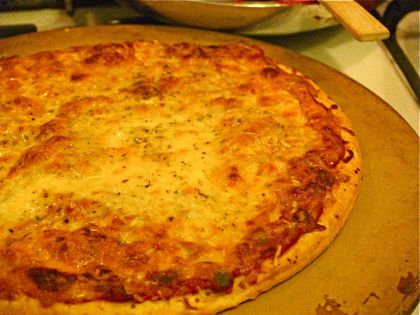
Cuban Pizza Recipe

 When I say I'm making Cuban pizza, no one believes it's a real thing. 

What makes it Cuban, you ask? Well, it starts, just like all good Cuban food, with a sofrito. A Cuban "sofrito" is the beginning and end of all that is good and holy about Cuban food - onion, garlic, bell pepper perfectly sauteéd in olive oil with a hint of tomato and spices. 

For the cheeses, you will want to add some gouda to the mozarella and parmesan. Then just sit back and enjoy the compliments. 

The Very Best Homemade Cuban Pizza EVER

Cuban-pizza1
Cuban-pizza1
  • 2 pkgs. Pre-made pizza crust or you can also use the refrigerated dough (I use Boboli Original Pizza Crust)
  • Olive oil
  • 6 garlic cloves – minced
  • 1 small yellow onion – diced
  • 1/2 green bell pepper – diced
  • 1 small can tomato paste
  • 1 small can tomato sauce
  • 3 Tbsp. Dry white wine
  • 1 tsp. whole cumin
  • 1 tsp. Oregano
  • Salt & pepper to taste
  • 3/4 cup grated Gouda cheese
  • 3/4 cup grated Mozzarella cheese
  • 1/2 cup fresh grated Parmesan cheese

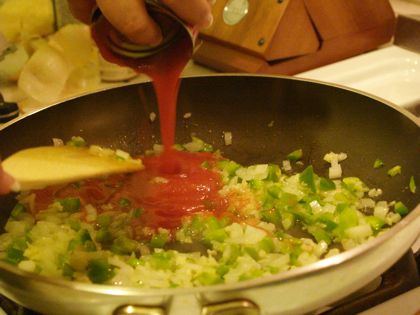
1) In a large skillet, sauté garlic, onion, and bell pepper in olive oil over medium heat.

Remember, you’re making a sofrito for the sauce.

Cuban-pizza-sofrito2

2) Cook and stir until onion is translucent, but make sure not to burn the garlic.

3) Add tomato sauce, tomato paste, white wine, cumin, oregano, salt, and pepper.

4) Cook over medium heat for about 5 minutes or until well-blended and heated through.

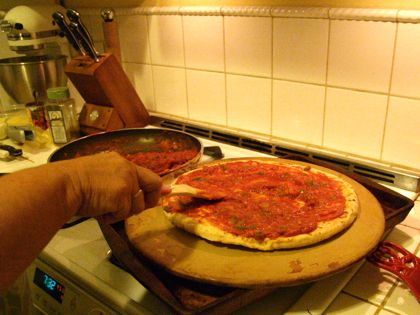
5) Spread this sofrito sauce over pizza dough.

Cuban-pizza-spread3
Cuban-pizza-spread3

6) Mix the gouda and mozzarella cheeses together and cover the pizzas with these.

7) Sprinkle the grated Parmesan over all. This is what gives it that toasty cheese look and taste.

Cuban-pizza-cheese4
Cuban-pizza-cheese4

8) Sprinkle lightly with a little bit more oregano.

9) Cook in a hot oven at 450 degrees for about 15 minutes or until cheese is melted and toasted.

Cuban-pizza-slices5
Cuban-pizza-slices5

10) WARNING: Resist the temptation to bite into it immediately, even though you will be enticed to do so by the blissfully amazing Cuban-food smell. 

11) You can thank me later. 

// <![CDATA[ var pfHeaderImgUrl = '';var pfHeaderTagline = '';var pfdisableClickToDel = 0;var pfHideImages = 0;var pfImageDisplayStyle = 'right';var pfDisablePDF = 0;var pfDisableEmail = 0;var pfDisablePrint = 0;var pfCustomCSS = '';var pfBtVersion='1';(function(){var js, pf;pf = document.createElement('script');pf.type = 'text/javascript';if('https:' == document.location.protocol){js='https://pf-cdn.printfriendly.com/ssl/main.js'}else{js='http://cdn.printfriendly.com/printfriendly.js'}pf.src=js;document.getElementsByTagName('head')[0].appendChild(pf)})(); // ]]</p></div>
Cuban Pan con Bistec Recipe (Cuban Steak Sandwich)

Working Smarter

I’m lazy. There, I said it.  No, it’s really okay. I freely admit it.

Yep, L-A-Z-Y. Which is why I’m not a big fan of spending hours in the kitchen slaving over a hot stove.  I’m going to go out on a limb here and guessing that there aren’t a whole lot of fans of hot-stove-slavery out there, but that’s not important right now.

And when I cook, particularly Cuban food, it’s usually because I’m just craving a particular taste and I’m too lazy to drive a couple of hours on the Los Angeles freeway system to go on a Cuban Food Hunt.

But on the other hand, I do spend time (sometimes a shameful amount of time!) trying to figure out the easiest way to satisfy my current Cuban food craving.

What this means is that you’re totally in luck today.  Because I was craving a fantastic Pan con Bistec – Cuban steak sandwich.  And believe me, not all steak sandwiches are created equal.

Which is why instead of starting with a pounded-within-an-in-of-its-life dry round steak, I started off with a mouth-watering boneless beef rib-eye which makes my steak sandwiches worth the 10 minutes it takes to slice up and cook up those melt-in-your-mouth rib-eye strips.

Now that’s what I call working SMARTER, not harder. 

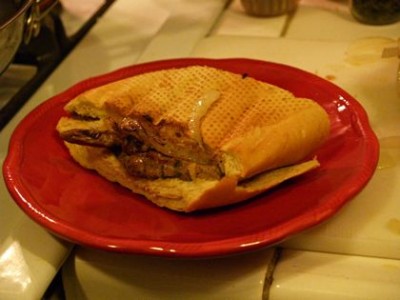
Pan con Bistec – Cuban Steak Sandwich

Pan-con-bistec1
Pan-con-bistec1

INGREDIENTS:

  • 2 Tbsp. Butter
  • 2 Tbsp. Olive oil
  • 1 large white onion, cut in half and sliced
  • 1 24-inch loaf of Cuban bread (or your favorite baguette-type bread)
  • 1 lb. Boneless beef rib-eye steak, sliced into 1/2 inch strips (this cut makes all the difference!)
  • Parsley flakes
  • Salt & pepper to taste
  • 6 slices Swiss cheese (optional)

DIRECTIONS:

1) Slice the bread into four (or six) equal parts – depending on the size of sandwich you prefer.

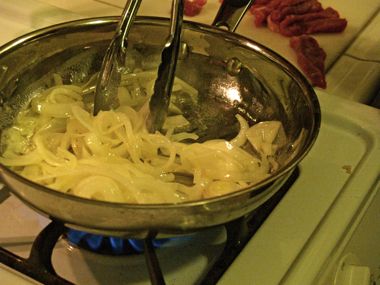
2) In a large skillet, heat the butter and olive oil together and sauté the onion until slightly soft.  Season with salt, remove cooked onions from skillet and set aside.

Pan-con-bistec-2
Pan-con-bistec-2

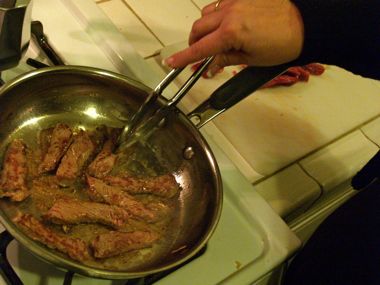
3) In the same skillet, over high heat, sear the steak strips until brown. About one minute per side.  NOTE: Do not stir the meat. You want it brown. Use tongs or a fork to flip.

Pan-con-bistec-3
Pan-con-bistec-3

4) Season with salt, pepper, and parsley flakes.

5) Remove steak from heat.

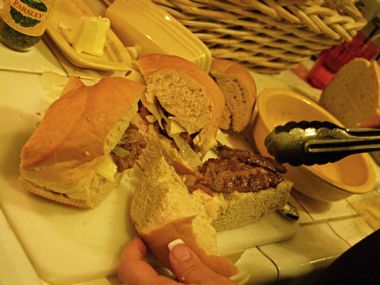
6) Divide steak among your pre-sliced bread.

Pan-con-bistec-4
Pan-con-bistec-4

7) Cover the steak with onions and (if desired) a slice of Swiss cheese.

8 ) Spread a thin layer of butter on the outside of sandwich.

9) Press in a sandwich press (or you can even use a George Forman Grill).

Pretty smart, right?

By the way, If you’d like to follow me on Twitter, I’m @Smrtqbn. 

// <![CDATA[ var pfHeaderImgUrl = '';var pfHeaderTagline = '';var pfdisableClickToDel = 0;var pfHideImages = 0;var pfImageDisplayStyle = 'right';var pfDisablePDF = 0;var pfDisableEmail = 0;var pfDisablePrint = 0;var pfCustomCSS = '';var pfBtVersion='1';(function(){var js, pf;pf = document.createElement('script');pf.type = 'text/javascript';if('https:' == document.location.protocol){js='https://pf-cdn.printfriendly.com/ssl/main.js'}else{js='http://cdn.printfriendly.com/printfriendly.js'}pf.src=js;document.getElementsByTagName('head')[0].appendChild(pf)})(); // ]]</p></div>
Dulce de Leche Cheesecake Recipe

Going Old School

It’s November, people.

Of course you know what that means: It’s time for the holiday "comelatas" to begin.

At our house the main course menus don’t vary much from year to year. But then there are the desserts.

Ah, yes. Desserts. Plural.

I don’t know of a Cuban anywhere who doesn’t love something sweet with their after-dinner cafécito.

But which dessert? There are so many to choose from!

There are dozens of classic “old school” desserts, like flan, pudin de pan, natilla, cascos de guayaba con queso crema, not to mention our classic pastelitos.

But I decided to try something new with an “old school” flavor.

This week’s recipe is a two-step affair. First we’re going to make Dulce de Leche.

Then we’re going to put it into a cheesecake.

It’s incredibly easy, but it looks really impressive and it tastes even better.

Okay. I admit it. I get a little stressed around this time of year.

But you know what they say:

“Stressed is just DESSERTS spelled backwards.”

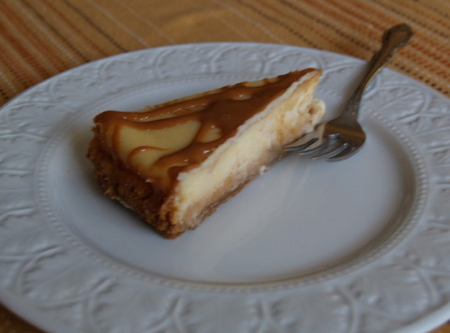
Dulce de leche cheesecake

Dulce de Leche Cheesecake Recipe

Homemade Dulce de Leche:

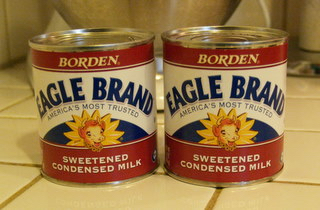
  • 2 cans of sweetened condensed milk
Dulce de leche cheesecake2

Crockpot method:

  1. Remove the labels.
  2. Place the still sealed cans in a crockpot.
  3. Cover the cans with water so they are completely immersed.
  4. Cook on high for 5 hours.
  5. Remove from the crockpot and let them cool completely.

Here's a video to show you how:

Pressure cooker method:

  1. Remove the labels.
  2. Place the still sealed cans in a pressure cooker.
  3. Cover the cans with water.
  4. Cook on high pressure for 40 minutes.
  5. Let the pressure drop on it's own for about 15 minutes. Remove. Let the cans cool completely.

For the Crust: 

(you can also use a ready-made graham cracker crust if desired)

  • 1 cup graham cracker crumbs
  • 3 tbsp. butter, melted

Filling: 

  • 3 (8 oz.) packages cream cheese, softened
  • 1 cup sugar
  • 2 tbsp. all-purpose flour
  • 2 tsp. vanilla extract
  • 3 eggs
  • 1/3 cup whole milk
  • 1 can Homemade Dulce de Leche

Reserve about 1/3 can of Dulce de Leche to drizzle over finished cheesecake.

Instructions:

1) Preheat oven to 400°

2) Mix crust ingredients together, and press into the bottom of a lightly buttered 9-inch springform pan. Place pan on a baking sheet and bake for 10 minutes. Remove from oven and cool to room temperature.

3) Reset oven temperature to 325°

4) With an electric mixer beat cream cheese, sugar and flour together until well mixed and smooth.

5) Add vanilla and beat until smooth. Add eggs one at a time, beating well after each addition. Beat until smooth. Add milk and mix until well blended.

6) In a smaller bowl, stir up the Dulce de Leche quickly to soften up. Measure about 1/2 cup of the cheesecake batter and pour into the softened Dulce de Leche. Stir until well combined.

Dulce de leche cheesecake 3

7) Pour plain batter over crust. Top with Dulce de Leche batter by placing rounded spoonfuls over the cheesecake batter and gently swirl into plain batter with the tip of knife or spatula.

Dulce de leche cheesecake 4

8) Bake in preheated 325°F oven for one hour or until center is almost set.

9) Remove from oven and gently run metal spatula around rim of pan to loosen cheesecake (this helps prevent cracking). Release the springform pan. Let cool 20-25 minutes before covering and placing in the refrigerator. Refrigerate 4 to 6 hours or overnight before serving.

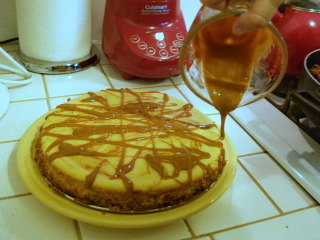
10) Stir the reserved Dulce de Leche quickly to soften and drizzle over finished cheesecake.

(NOTE: you can heat the Dulce de Leche slightly if it’s not soft enough, but don’t OVERcook it!)

Dulce de leche cheesecake 5

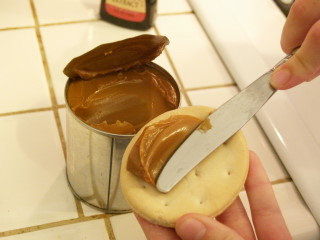
Oh WAIT! I told you to cook two cans, didn’t I?

Here’s what you do with the second one:

You grab a knife and some galletas and you go “old school.”

Dulce de leche cheesecake 6

Buen Provecho!

// <![CDATA[ var pfHeaderImgUrl = '';var pfHeaderTagline = '';var pfdisableClickToDel = 0;var pfHideImages = 0;var pfImageDisplayStyle = 'right';var pfDisablePDF = 0;var pfDisableEmail = 0;var pfDisablePrint = 0;var pfCustomCSS = '';var pfBtVersion='1';(function(){var js, pf;pf = document.createElement('script');pf.type = 'text/javascript';if('https:' == document.location.protocol){js='https://pf-cdn.printfriendly.com/ssl/main.js'}else{js='http://cdn.printfriendly.com/printfriendly.js'}pf.src=js;document.getElementsByTagName('head')[0].appendChild(pf)})(); // ]]</p></div>
Cuban Picadillo Pies® Recipe

I have a recipe today that was kind of a happy accident.

Ever since I went up to San Francisco a few months ago to cook my Picadillo, my family has been clamoring for it. Yes, there's been clamoring. For the past few years I've been making my picadillo with ground turkey. It's just become a thing.

When I cooked for the Blurb Food Fair, I used fresh ground beef. And here's what I found: it definitely tastes different. Better. In fact, I'm so sorry, ground turkey, but ground beef totally wins.

I mentioned this tidbit to my family and immediately they started asking for it. Clamoring. I had already sung the praises of the ground beef vs the ground turkey. I couldn't just leave them hanging.

Fine, I said. I'll do it, I said. And I did. And there was much rejoicing in the land.

Last week Eric's family was having a Christmas party and we were asked to bring appetizers for the buffet.

Eric: "Why don't you just make the picadillo? With the beef, of course."

Me: "Because it's a main dish, not an appetizer. That would be weird."

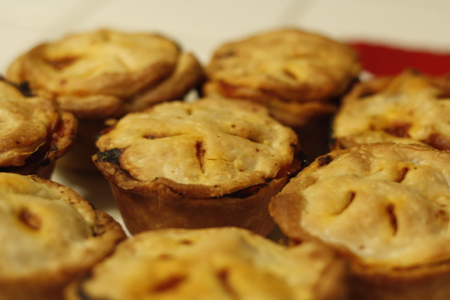
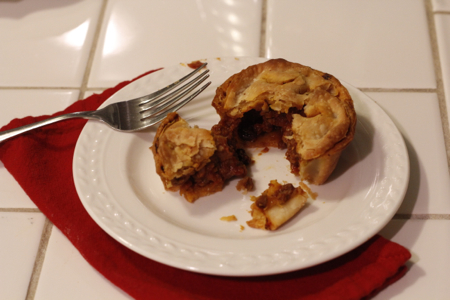
Then the brainstorming began and the result was the making of individual personal meat-filled pies. Cuban Picadillo Pies®. Not empanadas, but muffin-tin sized pies. Enough that you get a good portion of picadillo and the perfect proportion of crust. In fact, a couple of these beauties and a salad is practically a complete meal.

They were the hit of the party, by the way. But I sort of knew that would probably be the case. Hello? Cuban. Picadillo. Pies. It's genius, right?

After some experimentation, I decided the picadillo filling needed to have a little more substance and not be too runny, so I added more tomato paste. I added an envelope of Golla seasoning with saffron. I just love the taste it adds, but it can be made without it.

Also, I came to the cataclysmic decision to not use the olives. I know. Call me a rebel. The pie filling is therefore thicker and sweeter than regular picadillo, which works with the slight saltiness of the crust.

Picadillo pies
Picadillo pies

You love me now, don't you?

Cuban Picadillo Pie Recipe

Cuban Picadillo Pies

  • 3 Tbsp olive oil
  • 1 small onion, diced
  • ½ green bell pepper, diced
  • 2 cloves fresh garlic, pressed
  • 1 ½ lbs. Ground beef
  • 1 tsp. Salt
  • ½ tsp. Pepper
  • ½ tsp. Cumin
  • ½ tsp. Oregano
  • 1 can (8 oz) tomato sauce
  • 2 small cans tomato paste
  • 1 small envelope Sazón Golla (with saffron)
  • ¼ cup dry white wine (the cheaper, the better!)
  • 1 small box of dark raisins
  • 2 packages Refrigerated Pillsbury Pie Crust
  • A small amount of butter to grease the muffin tin

1) Heat the olive oil in a large skillet over medium heat. Saute the onion, green pepper and garlic until the onion is transluscent.

2) Add the ground beef and brown over medium heat.

3) Add the rest of the ingredients and continue cooking until meat is tender and completely cooked through. About 25 minutes.

4) Let picadillo cool completely.

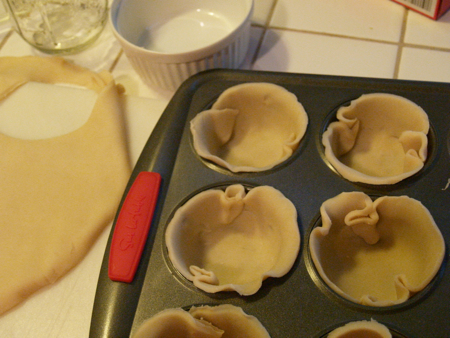
5) Grease muffin tin slightly with butter. Mostly just around the bottom.

Muffin tin
Muffin tin

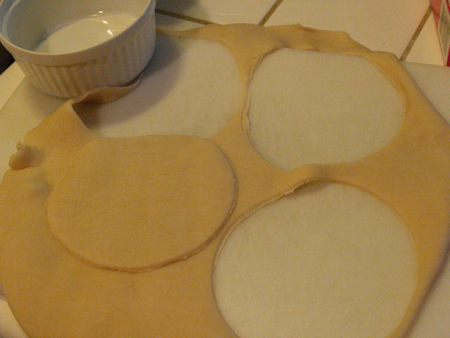
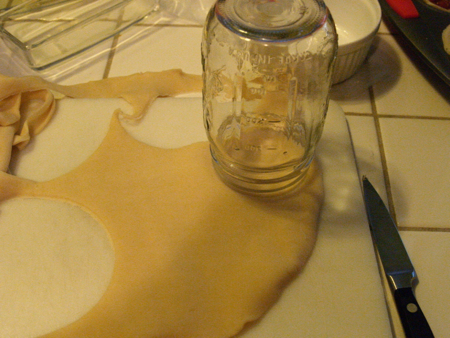
6) Cut approximately 5" round circles from pie crust. (I used what I had handy in my kitchen. I'm going to run out and get proper circle cookie cutters for next time, but that's not important right now.) You can get about four 5 inch crusts out of the pie crust and then I combine and roll out the remainder for the tops.

Picadillo pie dough
Picadillo pie dough

7) Stuff these into the greased muffin tin.

Picadillo pie dough in tin

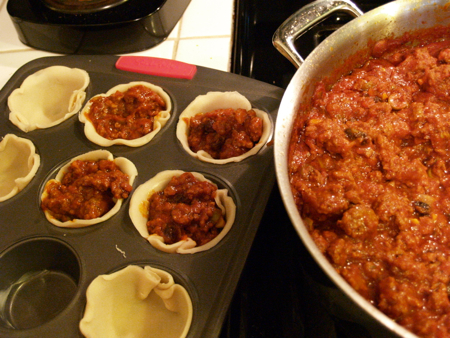
8) Spoon cooled picadillo into the pie crust.

Picadillo pie filling

9) Using the leftover dough, roll it out to seal and Cut 3" circles from the scraps of the pie crust.

Cutting dough
Cutting dough

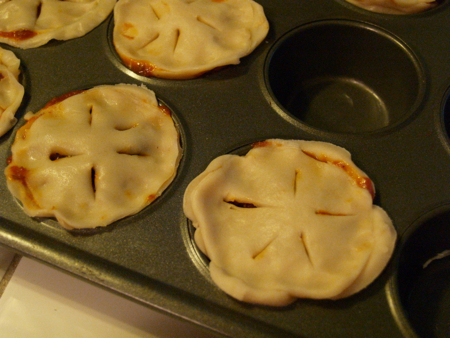
10) Stretch these out just slightly to make tops of the pies.

Picadillo pies before baking

11) Press the top and bottom edges of pies together to seal. With a knife, make some slits on the top to vent. You can also just poke a hole in the middle. That works, too, but isn't as cute.

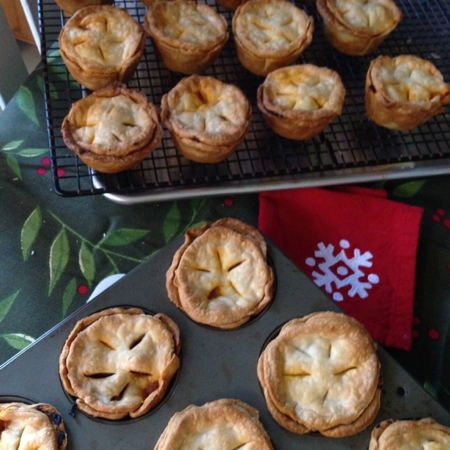
12) Bake in a 425 degree oven for about 20 to 25 minutes, or until crusts are brown. Allow to cool for a bit before serving. Makes 12 pies.

Baked Cuban Picadillo pies

Now they're clamoring for my Cuban Picadillo Pies.®

I totally called it.

Arroz con Maiz Recipe - An Original Thanksgiving Side Dish Cuban-style

Thanksgiving with my big, fat, Cuban family is usually a very typical American feast. But because my family has so many amazing cooks, we're often trying new recipes and sometimes we like to put a spin on some old classics. 

Our turkeys have run the gamut from deep-fried to classically oven-baked to (my favorite) the Guavalicious Bird

I started mentally listing the side dishes we usually enjoy with our Thanksgiving turkey:

  • Mashed Potatoes
  • Stuffing
  • Green Bean Casserole
  • Sweet Potatoes
  • Cranberries
  • Corn

And as much as I love these foods and the lovely blending of these flavors with the turkey, I sometimes crave the familiar. By that I mean something that starts with a sofrito, of course.

So I opted to take a traditional Thanksgiving side dish (corn) and added a Cuban spin to it. (Because I can.)

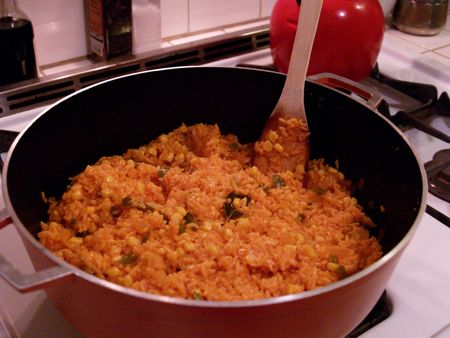
Arroz con maiz
Arroz con maiz

That's right. This year, our Thanksgiving table will be graced by a big, fat, pot of Arroz con Maiz (that's Rice with Corn for those of you who dimly remember Spanish 101). 

Arroz con Maiz Recipe - Cuban-style

  • 2 Tbsp. olive oil
  • 1 large yellow onion, diced
  • 1 medium green bell pepper, diced
  • 3 garlic cloves, minced
  • 1 cup tomato sauce
  • 2 bay leaves
  • 2 cups long grain white rice
  • 1 envelope Goya Sazón con Azafran
  • 1/4 cup white cooking wine
  • 3 1/2 cups chicken stock
  • 1 cup canned corn, drained
  • Salt & pepper to taste
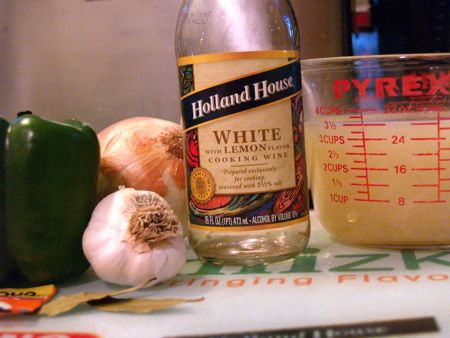
Sofrito ingredients
Sofrito ingredients
  1. Heat the olive oil in a large saucepan over medium heat.
  2. Add the onion, bell pepper, and garlic, and saute for 5 to 7 minutes, until the onions are translucent. Be careful not to brown them.
  3. Add the tomato sauce and bay leaves, cook for 5 minutes.
  4. Add the rice and stir well.
  5. Add the Goya seasoning, white cooking wine, and stock, stirring to combine.
  6. Reduce the heat to low, add the corn and fluff the rice with a fork.
  7. Cover the pan and continue cooking for about 20 minutes, until the rice is tender and fluffy.
  8. Taste the rice, adding salt & pepper to taste.

Buen Provecho and Happy Thanksgiving!

Arroz con Salchichas Recipe

Smells Like Cuban Food

You know you’re in a Cuban home if, when you walk in, you can smell The Smell. You know what I’m talking about - that unmistakable, mouth-watering, oh-so-inviting, my-mom-is-amazing, God-I-love-Cuban-food smell.

It all begins with a simple onion, a luscious green bell pepper and some garlic cloves – The Trifecta of Cuban Cooking Perfection.

Grab your olive oil and sauté those three until the peppers are soft and the onions are transparent, add a can of tomato sauce and you’ve got yourself a perfect “sofrito.” The sofrito is the basis of all that is good and holy in a Cuban kitchen.

The Unmistakable Smell travels upstairs and through the entire house, exactly like in those old cartoons where the smell of a fresh baked pie becomes a long, smoky arm attached to a beckoning hand, and when it reaches the unsuspecting noses of my fortunate family it leads them helplessly down to my kitchen.

“Cuban food!” they exclaim and hover around long enough for me to start giving the “set the table” orders.

They comply quickly and without complaint. Cuban food is its own reward.

It doesn’t get any better than this.

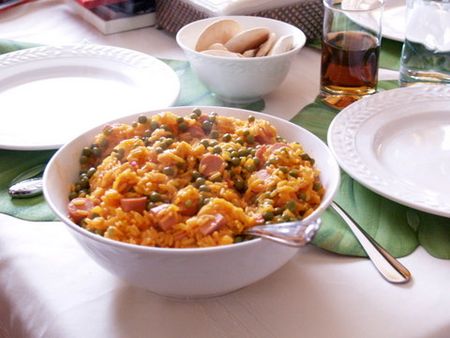
Arroz-con-salchichas-recipe

Arroz con Salchichas Recipe

  • 2 cups uncooked parboiled rice (Uncle Ben’s is best, but NOT the instant kind)
  • 1 cup cold water
  • 1 cup chicken broth
  • Olive oil
  • 2 drained cans Vienna sausage cut into 1 inch slices
  • 1 med yellow onion, finely chopped
  • 1/2 med. green bell pepper, finely chopped
  • 3 garlic cloves minced
  • 1 (8 oz.) tomato sauce
  • 1 cup dry white wine
  • 1 Bay leaf
  • 1 small jar diced red pimientos w/ liquid
  • Bijol -just a pinch to color the rice
  • 1 small can peas, drained

(NOTE: You don’t have to add salt, unless you want to. The broth and sausages usually add enough saltiness.)

1) Heat the olive oil in a large pan over medium high heat.

2) Add the onion, garlic, and green pepper and sauté about 5 minutes or until onion is translucent.

3) Add tomato sauce, white wine, pimientos with their liquid and bay leaf and simmer together over low heat for about 10 minutes.

4) In a large stockpot, bring water and chicken broth to a rolling boil.

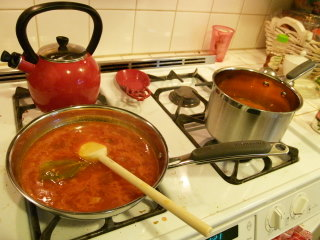
Arroz-con-salchichas-1

5) While the liquid is boiling, wash rice and drain well.

6) Color the wet rice with the Bijol powder. (you just add a pinch to quickly color the rice.)

7) Add the rice to the boiling water, stir well, and reduce heat to medium low.

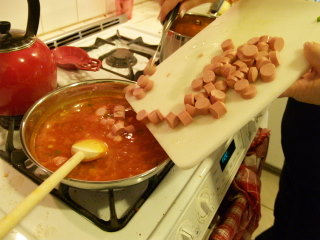
8) Add the sliced sausage to the tomato mixture and stir well.

Arroz-con-salchichas-2

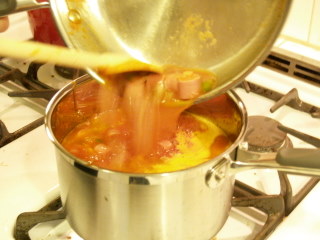
9) Add tomato mixture to the rice.

Arroz-con-salchichas-3

10) Continue cooking over low heat for about 20 minutes or until liquid is absorbed.

11) After the rice is done, quickly add the can of peas, stirring them into the cooked rice - let it sit for a minute or two, just until the peas get hot.

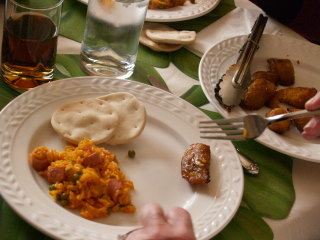
Arroz-con-salchichas-4

Serve with maduros, galletas and ice-cold Materva. Nope, it really doesn't get any better than this.

// <![CDATA[ var pfHeaderImgUrl = '';var pfHeaderTagline = '';var pfdisableClickToDel = 0;var pfHideImages = 0;var pfImageDisplayStyle = 'right';var pfDisablePDF = 0;var pfDisableEmail = 0;var pfDisablePrint = 0;var pfCustomCSS = '';var pfBtVersion='1';(function(){var js, pf;pf = document.createElement('script');pf.type = 'text/javascript';if('https:' == document.location.protocol){js='https://pf-cdn.printfriendly.com/ssl/main.js'}else{js='http://cdn.printfriendly.com/printfriendly.js'}pf.src=js;document.getElementsByTagName('head')[0].appendChild(pf)})(); // ]]</p></div>
Avocado Salad Recipe

Growing up Cuban meant we didn't eat many salads. And by "many," I mean, "none."

For the most part, the only time green things appeared on our plates were the tiny, diced pieces of bell pepper in our sofrito. (For the uninformed, sofrito is at the beginning of most Cuban dishes. Sauteed onion, garlic, and green bell pepper form the basis of the magic that is Cuban food, but that's not important right now.)

We add asparagus to our Arroz con Pollo and I think that pretty much ends our venture into "green" territory.

The exception being that on special occasions, we were treated to An Avocado Salad. *insert heavenly choir here*

Having grown up here in California makes me partial to the beautiful dark-skinnedAvocados from Mexico (as opposed to the big, fat, smooth ones from South Florida). Don't judge me. I also make a pretty mean guacamole.

Today, Mexico is the only place in the world where avocado trees naturally bloom four times a year. Which means that we get avocados here pretty much year-round. (Thank you, God.)

But every now and then I want my Avocados from Mexico to taste, well, Cuban. And this is my go-to salad. Don't you love it when I share?

Buen Provecho!

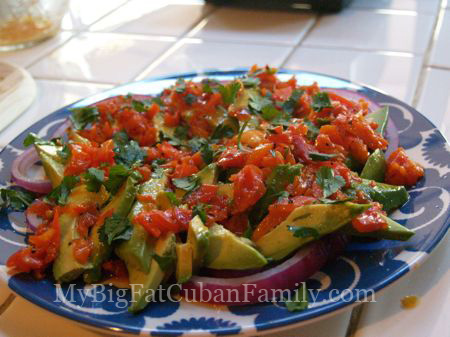
Avocado-salad
Avocado-salad

CUBAN-STYLE AVOCADO SALAD RECIPE

  • 2 ripe avocados, sliced
  • 1/2 large sweet red onion, sliced into rings
  • Sea salt
  • Fresh cilantro, chopped

Dressing:

  • 1/4 cup olive oil
  • Juice of 3 limes (about 1/4 cup)
  • 1 red bell pepper, diced
  • 1/2 packet of Sazón Goya Complete
  • Salt & pepper to taste

1) Blanch the bell pepper by putting in a small bowl and microwaving on high for about 40 seconds. Let cool.

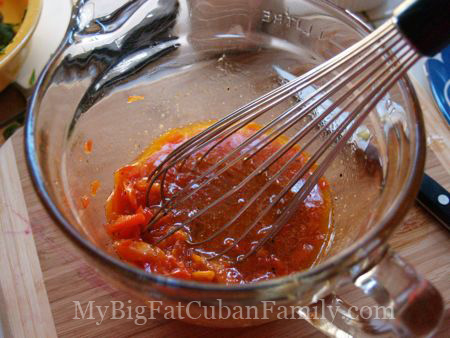
2) For the dressing, whisk together the olive oil, lime juice, Sazón Goya Complete and the cooled red bell pepper.

Avocado-salad-dressing

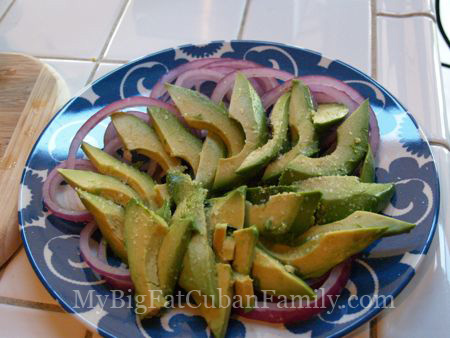
3) Arrange red onions on a plate, top with sliced avocados.

4) Salt the avocados.

Salted-avocados
Salted-avocados

5) Pour dressing over everything.

6) Top with fresh cilantro.

Cuban Style Avocado Salad

It totally feels like a special occasion, doesn't it?

Taking the Cake

It's not often that the entire family has the same craving at the very same time, but occasionally it happens.

The dinner conversation started innocently enough. "Best dessert you've ever had. Go!"

"Mom's Chocolate Mousse."

"The triple layer chocolate cake from the Daily Grill."

"Lemon bars."

"Pastelitos de guayaba. Duh."

"No. Wait! Remember the warm butter cake from California Pizza Kitchen?"

That's where the conversation abruptly ended. We all agreed that yes, the Butter Cake we had had at CPK was the best thing any of us had ever tasted. I actually had a childhood cake experience that came quite close, but that's not important right now.

The conversation eventually turned to: "Mom, you should make it."

And so it was that I went on a hunt for the Best Butter Cake Recipe. It turns out that CPK is not forthcoming with their recipe and that lots of people try to replicate it with varying degrees of success. And truly, there are a lot of good butter cake recipes out there. I finally found one that made me happy in my mom's old Cocina Al Minuto Cookbook. (Go figure.) 

It's called "Cake Coriente." Or, Basic Cake. (Umm...no. It's kind of fantastic. Nothing basic about it.)

So I tweaked Nitza's recipe a bit and played with the cream cheese topping. The key to the cream cheese filling is that it needs to give it the sufficient gooeyness this particular butter cake requires.

I was going to make the cake in individual ramekins, but I stumbled upon these cool mini (5 inch) springform pans at Target (here's the link) from Wilton that made me very happy. And since I was adding the cream cheese, I thought the cakes might go all cheesecake on me, so I decided these were a good choice.

Mini springform pans

Warm Cuban Butter Cake Recipe

Cake Batter
 (makes 4 - 5 inch cakes)

Start with all the ingredients at room temperature (including the eggs). If any of them are too cold, the batter and the cream cheese layer won't set up correctly.

  • 2 cups (4 sticks) unsalted butter
  • 4 ounces cream cheese
  • 2 1/4 cups granulated sugar

  • 2 large eggs
  • 1/2 teaspoon sea salt

  • 1 1/2 cups all-purpose flour

  • 1 1/2 teaspoons vanilla extract

Cream Cheese Layer

  • 4 ounces cream cheese
  • 1 egg
  • 1/3 cup granulated sugar

  • 1/2 teaspoon vanilla extract

Pre-heat oven to 325 degrees F.

1) Spray 4 mini springform pans (or ramekins) with baking spray or butter.

Prepare the cake batter as follows:

2) In a stand mixer cream butter, cream cheese, and sugar for 1-2 minutes.

3) Add eggs one at a time and beat on low for 20 seconds after each addition.

4) Whisk flour and salt, then add to creamed mixture. Beat on low until just incorporated, making sure not to over beat.

5) Add the vanilla.

Prepare the cream cheese layer as follows:

1) In a small bowl whip together cream cheese and granulated sugar until creamed, add egg and vanilla extract.

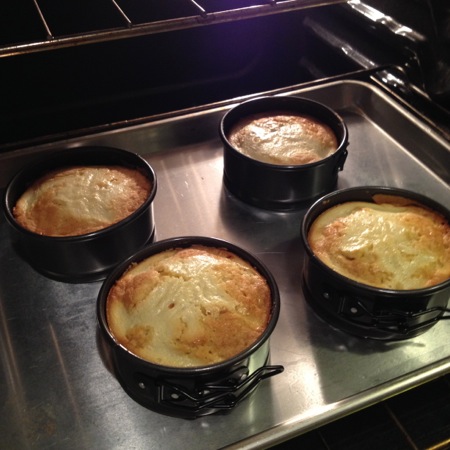
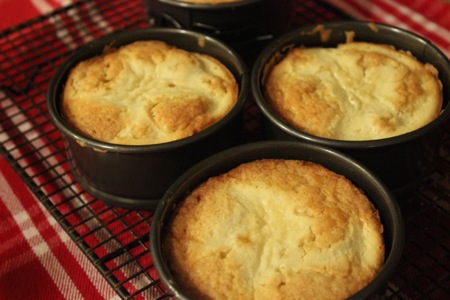
2) Pour cake batter into prepared springform pans then top with a layer of the cream cheese mixture. Bake for 60 – 75 minutes at 325 degrees (F), or until tops are golden brown and a toothpick comes out clean when inserted into the center of the cakes.

Butter cake
Butter cake

You can go ahead and make the cakes a day ahead and refrigerate. When ready to serve, microwave until hot (approximately 40 seconds). With a kitchen torch, you can brûlée the top and sides of the cake to caramelize the sugar crystals, but this is not necessary. The cakes will come out beautifully. I promise.

Optionally, you may want to drizzle with guava marmalade, which takes this dessert to another level, but that's not important right now.

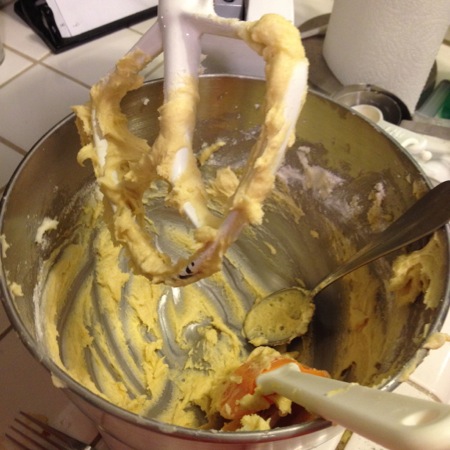
I think the very best part of this entire process for me was licking the beaters.

Cake mixer
Cake mixer

I swear, I haven't done this for years. I may or may not have traveled back in time a bit.

Also, I promise you, there's nothing "corriente" about this cake.

// <![CDATA[ // &lt;![CDATA[ // &amp;lt;![CDATA[ var pfHeaderImgUrl = &amp;#39;&amp;#39;;var pfHeaderTagline = &amp;#39;&amp;#39;;var pfdisableClickToDel = 0;var pfHideImages = 0;var pfImageDisplayStyle = &amp;#39;right&amp;#39;;var pfDisablePDF = 0;var pfDisableEmail = 0;var pfDisablePrint = 0;var pfCustomCSS = &amp;#39;&amp;#39;;var pfBtVersion=&amp;#39;1&amp;#39;;(function(){var js, pf;pf = document.createElement(&amp;#39;script&amp;#39;);pf.type = &amp;#39;text/javascript&amp;#39;;if(&amp;#39;https:&amp;#39; == document.location.protocol){js=&amp;#39;https://pf-cdn.printfriendly.com/ssl/main.js&amp;#39;}else{js=&amp;#39;http://cdn.printfriendly.com/printfriendly.js&amp;#39;}pf.src=js;document.getElementsByTagName(&amp;#39;head&amp;#39;)[0].appendChild(pf)})(); // ]]&amp;gt; // ]]&gt; // ]]>

Cuban Flan Recipe de La Reina

My mom calls herself La Reina del Flan (which would make me the Reigning Princess of Egg Custard, but that’s not important right now). On Christmas Eve, we sometimes have other desserts along with it, but in my big, fat, Cuban family, my mom’s flan is a given.

I have a ritual I go through every Christmas with her. She’s 99 now and even though she’s moving slower these days, she’s still sharp as a tack and is a wonderful storyteller. I invite her over to help me make a flan.

This is her specialty and, of course she insists I can’t make a proper flan without her.

She comes and watches me carefully as I start cooking the sugar to make the caramel, instructing me to make sure the color is a golden brown, although, she will always remind me, some people like it a little on the darker side, but not quite burnt.

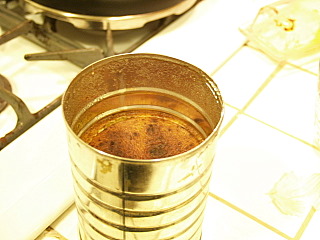
I usually double the recipe so that I fill one mold and then I have a clean coffee can I use to make a smaller flan. I know I can probably find a smaller mold, but there’s a reason I use the can. When she sees the can, it reminds her of her own mother and so she begins to tell me the story of how my grandmother would make a flan every single night for my grandfather.

Perez puelles fam106

It was around 1930 when they lived in the small port town of Manati, Cuba. She points to this framed photo I have of her family to illustrate the time and place. (My mom is the one in the back row with the Wilma Flinstone necklace.)

She loves to tell me how my grandmother used a can to make the flan in, and how she cooked it in a coal burning stove. A coal burning stove! She pauses in her story so that I can make the proper exclamation of amazement. Yes, her mother made flan every single night in a tin can because it was the perfect size for just one serving. Apparently, my grandfather insisted on having his flan every night for dessert.

She finishes up with awe in her voice: “siempre le quedaba perfecto.”

Okay, so the truth is that I know how to make a flan. And I know that if I double the recipe, I will have too much batter for my ceramic mold. And I don’t have to, but I use the can on purpose. Because I get to hear the story of my amazing grandmother, and the tin can, and the coal stove, and the perfect flan . . . one more time.

Can of flan
Can of flan

Feliz Navidad!

Flan de la reina
Flan de la reina

Cuban Flan Recipe de La Reina

  • ½ cup sugar
  • Squeeze of lemon juice
  • 1 (14 oz.) can sweetened condensed milk
  • 1 can of water
  • 1 tablespoon Vanilla extract
  • 1 whole egg, lightly beaten
  • 4 egg yolks, lightly beaten
  • Cinnamon

Caramel Coating:

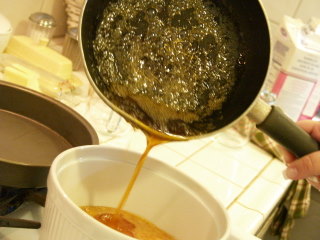
1) Heat the sugar with a few drops of water in a small saucepan with a squeeze of lemon juice and let it cook but do NOT stir. Move the pan around until it gets to a nice golden brown.

Carmelize sugar
Carmelize sugar

2) Pour the caramelized sugar into your mold, moving the mold around to coat the bottom and sides if you wish.

Coat bowl
Coat bowl

3) Set it aside and let it cool completely. It will feel smooth and hard, like glass.

Flan:

1) Preheat oven to 350 degrees.  In a mixer or blender (I use the mixer because I make a lot!), mix together the condensed milk and water until it’s completely well blended.

2) Add the beaten eggs and the vanilla.

3) Sift as you pour into the caramelized mold. (you’re sifting out any large pieces of egg white)

Sift eggs
Sift eggs

4) Sprinkle with cinnamon.

5) Cover tightly with aluminum foil.

6) Put your flan into an ovenproof dish or baking pan and fill with hot water to about half-way up the sides, or as high as you can go without spilling hot water on yourself. Bake for 45 minutes at 350 degrees F, or until a toothpick inserted in the center comes out clean. Keep an eye on the level of water - it can easily evaporate.

Cover flan
Cover flan

7) Remove from oven and water bath and let it cool completely, then refrigerate to chill.

8) Chill for at least one hour before serving.

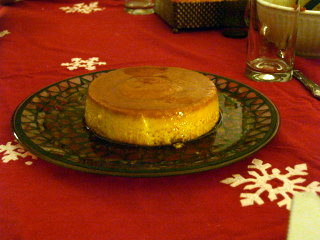
9) Run a knife around the edge, place on a serving platter (large enough to hold the caramel) and invert.

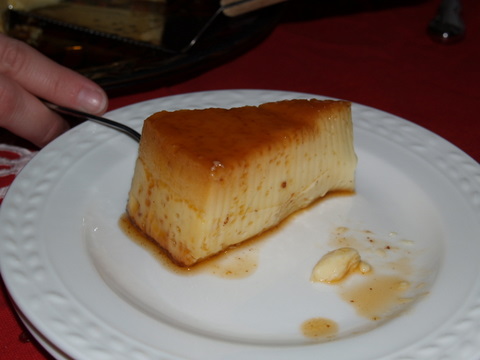
Flan
Flan

A Very Merry Christmas to you all!

// <![CDATA[ var pfHeaderImgUrl = '';var pfHeaderTagline = '';var pfdisableClickToDel = 0;var pfHideImages = 0;var pfImageDisplayStyle = 'right';var pfDisablePDF = 0;var pfDisableEmail = 0;var pfDisablePrint = 0;var pfCustomCSS = '';var pfBtVersion='1';(function(){var js, pf;pf = document.createElement('script');pf.type = 'text/javascript';if('https:' == document.location.protocol){js='https://pf-cdn.printfriendly.com/ssl/main.js'}else{js='http://cdn.printfriendly.com/printfriendly.js'}pf.src=js;document.getElementsByTagName('head')[0].appendChild(pf)})(); // ]]</p></div>

Churrasco con Chimichurri Recipe

A Simple Barbecue

My husband, Eric, invited one of his clients over for dinner the other night, and he asked me not to make a fuss.

“Let’s just barbecue,” he said.

“Fine,” I said, “I’ll just do a simple Cuban-style barbecue.”

So, I didn’t make a fuss . . .

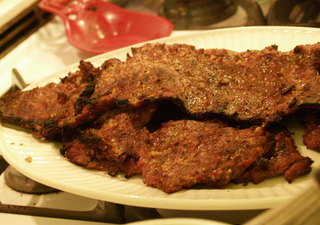
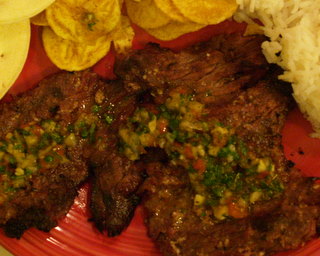
I made a mouth-watering Churrasco con Chimichurri

For the uninitiated, Churrasco is a garlicky, marinated flap or skirt steak that is barbecued and served with a flavorful sauce called Chimichurri.

“Umm… Honey? If this is simple, what’s an elaborate Cuban barbecue?”

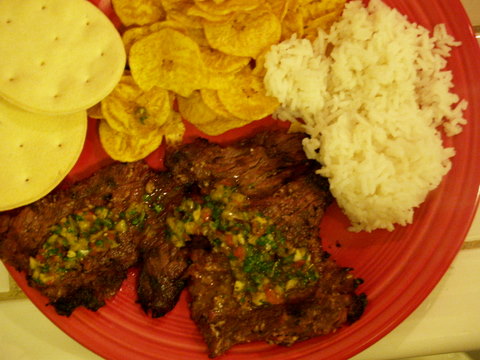
Churrasco
Churrasco

Churrasco Estilo Cubano Recipe

  • 3- 4 lbs. Skirt or Flap steak (NOT Flank)

Ingredients for Marinade:

  • 20 – 30 cloves garlic
  • 1 tsp. coarse ground black pepper
  • 1 ½ cup bitter orange juice
  • ½ cup white onion, minced
  • 2 tsp. oregano
  • ½ cup olive oil

For Steak Marinade:

1) In a food processor or blender, process garlic and pepper to form a paste.

Churrasco garlic
Churrasco garlic

2) Remove from processor and stir in bitter orange juice and oregano.

3) Let sit at room temperature for about 30 minutes.

4) Whisk in the olive oil until it’s well blended.

Preparing steak:

1) Remove steak from package and pat dry.

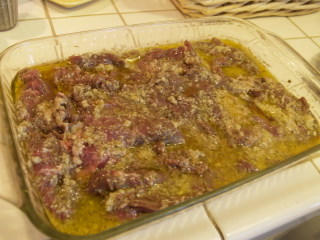
2) Place in a large bowl or flat Pyrex dish and cover with marinade.

Cuban garlic marinade

3) Cover and refrigerate for approximately two hours.

Chimichurri Sauce

1 bunch of cilantro leaves (or fresh parsley leaves)

8 cloves garlic

¼ cup vinegar

Juice of one lime

½ cup white onion

¼ cup sweet sweet roasted pepper strips (Vlasic)

3 Tbsp. oregano

2/3 cup olive oil

Salt & Pepper to taste

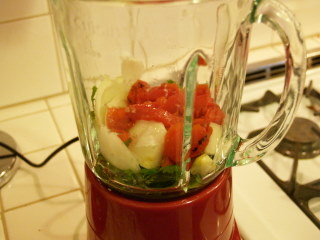
Chimichurri sauce
Chimichurri sauce

1) Put all ingredients EXCEPT olive oil in blender or processor and pulse to a thick mixture.

2) Do not over-process!

3) Remove from processor and whisk in olive oil - very important! .

4) Add salt and pepper liberally.

To cook:

1) Remove meat from marinade and grill on a pre-heated grill over medium high heat. Cook to desired doneness, but the more rare, the more flavorful.

Churrasco steak
Churrasco steak

2) Serve hot, topped with Chimichurri Sauce.

Here's a video with step-by-step instructions on how to make the Chimichurri Sauce of Awesomeness®.

Churrasco con chimichurri

WARNING! Chimichurri is highly addictive! Have lots of Cuban bread available for extra dipping! =D

Buen Provecho!

// <![CDATA[ var pfHeaderImgUrl = '';var pfHeaderTagline = '';var pfdisableClickToDel = 0;var pfHideImages = 0;var pfImageDisplayStyle = 'right';var pfDisablePDF = 0;var pfDisableEmail = 0;var pfDisablePrint = 0;var pfCustomCSS = '';var pfBtVersion='1';(function(){var js, pf;pf = document.createElement('script');pf.type = 'text/javascript';if('https:' == document.location.protocol){js='https://pf-cdn.printfriendly.com/ssl/main.js'}else{js='http://cdn.printfriendly.com/printfriendly.js'}pf.src=js;document.getElementsByTagName('head')[0].appendChild(pf)})(); // ]]</p></div>