Hipster Baby Shower

Welcome to the 2nd installment of Over-Sharing About My Parties Week

As you already know, I have a beautiful grandson who was born in August. His name is Asher David-Edmund and he is a gorgeous creature that we are all head over heels in love with.

Behold the besotted grandparents:

Asher and me

Eric & asher

Before he arrived, we had a really fun Hipster Baby Shower (of course!) in honor of him and his mama, which I want to overshare with you today. It was Amy who dubbed it The Hipster Baby Shower. I think because we had really different from your usual baby-shower-type decorations and food. Read on.

The Invitations

The theme for the baby's room was foxes and owls, so I created an invitation with a sweet owl design. For the life of me, I couldn't come up with a cute fox that made me happy, but that's not important right now.

I chose the tan, green and brown colors because that seemed woodsy and owlish to me. I used Photoshop (which I always do) because I like that I can add drop shadows to add a bit of dimension and texture.

Baby Shower Invitation

Our original plan was to have the party outside in my happy backyard with all the festive flags and things. However, it happened that that particular Sunday turned out to be The Hottest Stinking Day of 2014 here in Southern California with not a breeze in sight. 

So at the last minute (as in that very morning!) I made the executive decision to bring the party inside. Yikes! Freakishly small cottage-like house, remember?

But gratefully I have a very willing and understanding staff (ie. my family) and they quickly moved furniture and set up tables and things indoors while I was in the kitchen making delicious things.

The Centerpieces & Decor

I have seen baby shower decorations that are a banner-like clothesline full of baby clothes which I love because not only is it adorable, it's quite practical for the new arrival. But I wanted to do something slightly different for this event.

Also, I had a dream before they even knew that the baby was going to be a boy.

*Insert trippy dream sequence music here*  

In my dream, a little guy in denim overalls toddled up to me and I said to him in surprise, "You're a boy!" And he responded with, "You're my Wella!" And then I woke up. And I knew beyond a shadow of a doubt that this baby was going to be a boy. Also, you may now call me, Wella. (FYI: Abuela is the word for grandmother in Spanish. It works.)

I had a brainstorm. 

"What if..." I asked Lucy and Amy, "We got slightly larger, toddler-size clothes and stuffed them? Also, I really, really need to find some denim overalls."

They both agreed that it sounded a little crazy, but they decided to trust me. So off we went to shop for toddler boy things. And can I just say...is there anything cuter? Beside toddler girl things? (Notice the overalls, please.)

Baby overalls centerpiece

Lucy created a Welcome Asher Banner using my Silhouette Cameo.  

Baby shower centerpiece

Owl

We added summer flowers to add a pop of color and, of course, baby's breath. (See what we did there?)

Baby clothes

The Menu and Recipes

  • BBQ Chicken Skewers
  • Mini Grilled Brie Cheese Sandwiches
  • Beef Empanadas
  • Spinach-Strawberry Salad
  • Chicken & Waffles

The menu was fun and varied and everything still tasted good at room temperature, which made me happy. (This is where some of the Hipster vibe comes in.)

I pinned most of the recipes from Pinterest. I'll add the links.

Brunch

BBQ Chicken Skewers

Chicken skewers

Mini Grilled Brie Cheese Sandwiches

Grilled brie cheese sandwiches

Beef Empanadas (I used the same recipe as my Cuban Picadillo Pies® and cut them into 4 inch rounds, folded in half.)

Beef empanadas

Spinach-Strawberry Salad

Spinach salad

Chicken and Waffles. Yes. I said Chicken and Waffles. I know. Shut up.

I placed 2 Eggo Mini Waffles in each disposable cup. Added a chicken nugget to each one and filled a squeeze bottle with syrup so that guests could add their own.

They were the hit of the day.

Chicken and waffles

Because it was The Hottest Stinking Day of 2014, we just served ice-cold lemonade which was totally perfect.

Lemonade

Both our families showered the new parents with love and awesome gifts. And everyone agreed that the afternoon was a great (and delicious) success.

Asher blanket

Big deal

Look at how adorable all my girls are!

Amy lucy alysha marta

The Desserts

A friend of Alysha's made the gorgeous fox & owl cake pops. How cute are they?

Desserts2

Because I had already cooked everything else, I opted to keep the desserts simple. 

Desserts3

We picked up an apple pie from Costco because that just sounded like a fun dessert. Amy ordered some mini bundts from Nothing Bundt Cakes in assorted flavors. (I know. Great name, right?) Also, we offered some tasty Madeleines, because who doesn't love Madeleines? Am I right? 

All this took place in my freakishly small cottage-like yet air-conditioned home. (Win!)

The new parents felt loved and blessed and maybe just a little bit more prepared to welcome sweet Asher into their lives.

Alysha and adam

Also, call me, "Wella." 

Celebrating Gratitude

In my family of origin we have the custom of always sending out invitations to events that people already know about and are coming to anyway. Welcome to our own special brand of crazy.

Thanksgiving is always on the 4th Thursday of November. My sisters and I are pretty much in constant discussion for weeks ahead of the party. Who will bring what? Who is coming? How many? All those details that I'm pretty sure everyone's family discusses before major events.

Now, having all this information, we dial up the planning to include invitations to the people we already know are coming. Like I said, our own special brand of crazy. But it's our crazy and we like it.

I have also been one-upping myself every year when it comes to setting the tables and creating the atmosphere for the last few Thanksgiving celebrations. Here are the links: 

Styling a Quick and Easy DIY Thanksgiving and The Cuban Hipster Thanksgiving.

I went to Pinterest (where I spend way to much time collecting inspiration and if you don't already, you should totally be following me, but that's not important right now) and found an invitation design I liked well enough to copy in my own fashion.

Also, I've been throwing a lot of parties every month for the past few months that I haven't even written about. (Imagine!) I think I'll just have to write about all of that now that I have time to sit down before the Cuban Christmas Crazy begins around here.

I am now officially declaring that this first week of December will be:

Over-Sharing About My Parties Week. (It has to be done.)

Let the Over-sharing begin!

The Invitations

Here's my preliminary sketch:

My-big-fat-cuban-family-sketch

Here's the finished invitation:

My-big-fat-cuban-family-thanksgiving-invitation

I was quite pleased with how they turned out. Also, if you care about these things, the fonts I used were Market Deco and Thirsty Script, thankyouverymuch.

So, I sent out the invitations the first week of November and everyone who was able to attend responded happily. We only had 20 this year because the people who usually travel, didn't this year and the ones who trade off holidays with other families went elsewhere. It felt more intimate than usual.

If you can technically call a sit down dinner for 20 intimate. Hello? It's a Cuban thing.

Paper Chain Garlands

I know. What??

Paper Chain Garlands. I became kind of enamored with paper chain garlands this year. You know, like the kind you used to make in school out of construction paper? Only in 2014, scrapbooking is a thing and there are a bizzillion choices for decorative papers.

For my color scheme, I chose oranges and purples, with touches of green and teal blue.

Paper chains

And in case you've forgotten, here's how to make paper chain garlands:

  1. Cut strips of paper into 8" x 1 1/2" strips.
  2. Create a loop and close it with tape, overlapping just the ends.
  3. Link the next paper strip into the first loop, again closing with tape and overlapping just the ends. 
  4. The finished chain is determined by how much paper and effort you want to put into it.

I recruited the fam and we created and hung yards of chains in less than an hour. As you can see, I hung the Give Thanks banner we made last year. Before we even got to decorating tables the place already had a really festive air. 

Paper chain garlands

The Tables

When I'm entertaining in my freakishly small cottage-like home, we usually have to move furniture to fit the tables into my front room. We're getting so pro at this, I swear. 

We remove two big armchairs, the coffee table, a side table and lamp to make room for the two 8 foot long tables we put together to seat 14. Our regular dinner table seats 6. If we have more guests we "create" a room in the back, but that's another story. Because we only had 20, we were able to host everyone in one room. (Yay!)

My-big-fat-cuban-table-with-paper-chains

I was originally going to use burlap tablecloths that I found online from a place that will remain nameless because when we opened up the package it reeked of petrolium. I decided to address that problem at another time and just pulled out my classic white tablecloths (which I have in multiple sizes, but again, not important right now) and grabbed some beautiful runners from Pier One. 

I used gold chargers for the base, my most favorite white dishes from Pier 1. They're called Antique Scroll and I have been collecting a few every few weeks until I had at least 14 to set the big table with. These are everyone's favorites and because they're white I tend to get lots of great mileage from them.

Antique-scroll-dishes

Once the gold chargers and dishes were in place, it seemed purple cloth napkins were ideal to pull off the look. 

My-big-fat-cuban-family.table

I designed menu cards to be used as napkin holders. Mostly because I did a version of them for an event last month for a completely different group. I'll blog about that one later this week. All that to say that the whole menu-cards-as-napkin-holder-thing made me really happy, so I decided to use it again.

I created them in Photoshop, using the Market Deco font from the invitation and the cute silverware graphic. 

I was not in charge of the menu at all this year so we went with a very traditional all-American menu with a few add ons. 

I printed the menus on cream cardstock and cut them in half horizontally. We folded, taped the back, and slid the napkins and silverware in each one. I liked how striking it all looked. 

Thanksgiving 2014 menu bands

The place cards were simple. Everyone's names in the Thirsty Script Font with the fork-knife-spoon graphic to the side. These were also printed on cream cardstock. (I do all the printing on my home color printer, an Epson Artisan.)

On the smaller table I used some beautiful square white plates (that totally match my other plates except for they are square!) that I found at Home Goods. (Win!)

My-big-fat-cuban-family-table2

For the centerpieces, I grabbed a few bouquets of fall flowers from Costco and hastily (read, "sloppily") trimmed and put them into gold and silver vases and threw some eucalyptus leaves down and called it good. (Don't look too closely at the centers. I have other skills, I swear.)

My-big-fat-cuban-family-thanksgiving-tables

 The overall effect felt elegant and warm. The paper chain garlands added a whimsical touch. Very much the effect I wanted.

The Meal

We had two turkeys. One roasted, one barbecued. Both crazy-delicious.

Turkeys

The sides were the usual suspects. I love using the disposable chafing dishes to keep the food hot. Not as pretty as serving dishes, but when you're feeding a hungry crowd they seriously appreciate the meal served hot.

Thanksgiving buffet

Thanksgiving dinner

The Photo Booth

Our dear neighbor (and fabulous photographer), Rafael always generously lends us his photo-booth-making gear and we set that up in Jonathan's room with a white sheet for a background. 

Eric-darby

Then we march each person, family, couple, kids, whoever, in front of the camera and let the magic happen. 

Lucy-and-me

While informal candids will always have their place in our celebrations, I usually have a very low-light situation in the dining area, so the photo booth setup gives us the photos we are wanting with the people we care about. We have so much fun taking turns having our silliness documented forever.

Also, it's becoming more difficult for me to host and document. The photo booth takes care of that for me. Thanks to Lucy for making it happen every year.

Lucy-darby


Plus, my mom, Luza (yes, she's 100!) totally gets into this part of the evening because she gets to spend at least a few moments with each and every person present.

Jon-and-lucy-with-luza

Yet another way to track the growth of the kids. All of them.

With-my-grandson

Me and my grandson, Asher. *sigh*

I'm extremely grateful that I have to get to do all of this work to celebrate the gratitude I feel for all the good things in my life. 

What a gift.

Eric-and-me

The Best Graduation Party of The Year

My son, Jonathan, graduated from high school a few weeks ago. As I've done with each one of my four kids, I asked what type of celebration he'd enjoy. 

The four of them have asked for completely different types of parties and I have tried my best to comply.

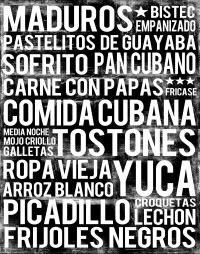
in 2001, Amy wanted an All-Cuban theme, with all the family and her friends, Cuban music, and food. So that's exactly what we did. I made Arroz con Pollo for about 50 people. It was a wonderful success.

2004 - Adam wanted a really nice dinner with just his closest friends. And Lucy (class of 2011) wanted a "classy outdoor dinner party" with a showing of the Marx Brothers' film, A Night at the Opera. I have obliged them all.

Warning: This is going to be a super loooong post with lots of photos and detailed descriptions and some serious over-sharing. (You're welcome.)

The Invitations

Jonathan wanted to celebrate with his two closest friends and have The Blowout of the Year. He wanted "The 3-D's: Dinner. Dancing. Donuts." Of course.

We bantered ideas back and forth with his two best friends, Nathan and Tori (the girl next door) and finally came up with this - Their own take on Ferris Bueller's Day Off.

We would call it JON, NATHAN, and TORI'S DAY OFF.

Ferris-bueller-theme-party-invitation

Lucy got the three of them together to do the Ferris inspired photo shoot, and worked her magic with Photoshop to create the clever double-sided invitations.

Ferris-bueller-theme-party-invitation2

They each invited friends and family. The RSVP's began immediately.

"We wouldn't miss it!"

"What a clever idea. Of course we're coming!"

"We will be there!"

At last count we had over 75 people including children and adults. 

The Preparations

As I wrote about in my last post, we decided, along with our neighbors (Tori's parents) to take down the fence between our yards. Read that story here: Tearing Down Fences.

We couldn't afford to pull up all the dying grass and create a cobblestone courtyard (my idea of perfection, but that's not important right now), so we grabbed all of the old pots that had once held plants that had long since died off, and Tori and I planted pretty color bowls to set around the neglected beds in our garden. 

Color-bowls

Also, we had our old wooden patio furniture that still looks pretty cool, but we weren't so sure it would actually hold bodies anymore, so we re-purposed them as plant holders. I was quite happy with the results.

Garden-color

Pots-in-garden

The day before the party we enlisted good friends and family to help with the heavy lifting and the addition of extra lights and things. One of the things that stresses me out the most when I'm entertaining is the idea that I have to be Superwoman and do it all, which, of course, is ridiculous. (It's also a Cuban thing, but that's not important right now, either.)

This time around I deligated, and practiced saying, "yes, thank you" when someone offered their help. This is new and unexplored territory for me. I must practice saying that magical incantation: "yes, thank you."

Remember those wonderful lights and flags we put up last year? Read about them here: Documenting the Magic. Well, the flags were a little sun-faded, but still very usable. (I was worried.)

Flags

Eric and crew hung them in strategic places. (I may or may not have made some sketches of where I wanted everything set up. Shut up. It's efficient.) Flags would go on either side of the "dance floor" (concrete slab), and along the garden's edge. 

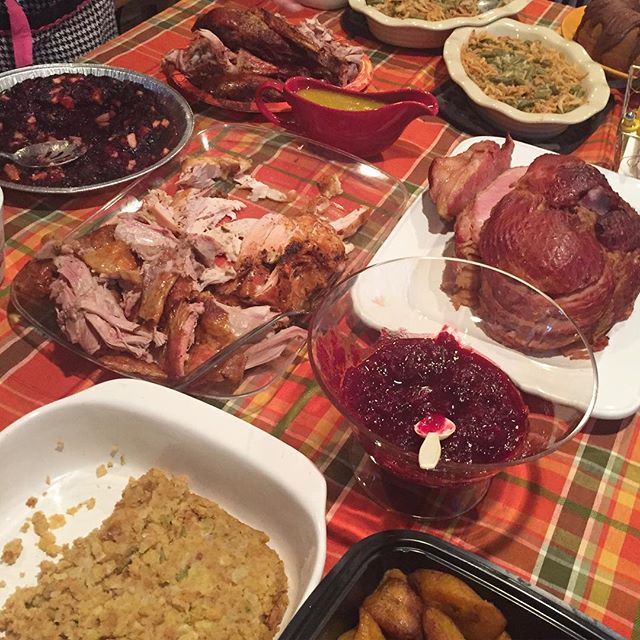
While digging around for all my decorative things I came across a bag full of fabric. It was actually just rags. The triangular pieces left over from cutting the flags last year. I quickly decided that those would make an awesome 'rag banner' to drape over the dance floor. I enlisted the girls next door to just tie the rags onto twine and call it good. I wrote about the amazing twine here: Styling a Quick and Easy DIY Thanksgiving.

This might be my favorite decoration of all.

Rag-tied-banner

For those of you that are curious about the metal poles holding up those lights and flags. Eric got some 18" metal pipes that he pounded into the ground. Into these he inserted the long 10 foot metal poles. I think they can be found in the electrical or plumbing sections of Home Depot. At the top of the poles, he added some "S" hooks which are held down with white duck tape. I know. It's so much simpler than it looks, but the end result is stunning.

They look even more magical at night.

Flags-and-lights

The Posters

Remember that our general theme was Ferris Bueller's Day Off? Lucy created some really fun poster designs for each of the three graduates with quotes from the movie and we had them mounted and hung them in different spots around the yard.

Jonathan-ferris-bueller-quote

"The question isn't: 'What are we going to do?' The question is "what aren't we going to do?""
 
Tori-ferris-bueller-quote

"You realize if we played by the rules right now we'd be in gym?"
 
Nathan-ferris-bueller-quote

"How can I possibly be expected to handle school on a day like this?"
 
Life-moves-pretty-fast

"Life moves pretty fast. If you don't stop and look around once in a while, you could miss it."

So cute, right?

I also got dozens of plain black sunglasses as a lovely parting gift to give to the guests. These were quite a hit.

Our-futures-so-bright

Shades

The Signs

We were going to be hosting such a large crowd and I didn't want our guests to be wondering where things were or what was going on, so I made signage. (People, this is what I was born to do.)

This first chalkboard was right outside the front door. I wanted my guests to feel comfortable right away. It was quite effective and they knew what to do immediately. I also had two friends stationed inside greeting and giving directions. Because is there anything worse than getting to a party and not knowing where to go? (I should teach a class in Cuban Hospitality 101. Thank you, Haylee and Marc!)

Chalk-sign-welcome

Also, we came up with our own hashtag. (I know. Shut up.) So if you were following along on Instagram or Facebook, you would just follow the #jntdayoff tag.

(Speaking of following, if you don't already, you should be totally be following me on Instagram. I'm Smrtqbn.)

As you walked into the back yard, almost the first thing you saw was the piece of our old fence, now painted with chalkboard paint and sporting directions.

Fence-chalkboard-sign

The food had its own signage. And so did the desserts, which were located next door. (I should be crowned Signage Queen. Just sayin.')

Sweets

This is the view from the far end of our house looking out over everything. Even before our guests had arrived I was feeling so pleased with our hard work.

Backyard-party-decorations

 The Food

I decided to keep the food as simple as possible and decided to serve my own version of Southern California Mexi-Cuban. (What? Mexi-Cuban doesn't exist? It does now.)

First, we had a Make Your Own Tostada Bar.

Make-your-own-tostada-sign

I deep fried 6 inch flour tortilla shells into a "bowl" shape.

Tostada-shells

We provided 3 kinds of meat: Cuban-style pork, ground beef (really it was picadillo without the raisins and olives. Shh!), and a crockpot lime chicken (I promise I'll share that recipe another day). The pork and the chicken I made in two crockpots the night before.

Make-your-own-tostada-bar

We also had black beans (duh) and a blend of grilled onions and peppers (Shh! It was really a sofrito). The idea was to grab a tortilla shell, put in some beans and your own meat and your favorite toppings, which included lettuce, sour cream, olives, cilantro, scallions, tomatoes, lime, avocado, guacamole, cheese, and of course, salsa. (Thank you, Stacie, for all the chopping and grating!)

Are you feeling the Mexi-Cuban vibe? I'm on to something.

Make-your-own-tostada-bar-toppings

Everything was pretty easy and according to all the guests, delicious. 

The other (genius) thing we served - did I mention most of our guest were teenagers? - was the Walking Tacos.

Walking-Tacos

1) You start off with a bag of Fritos or Doritos, which you crush before opening.

Chips-for-walking-tacos

2) You open the bag and add meat and toppings.

3) Top this with Ranch Salsa. Basically half Ranch dressing and half salsa mixed together to make a wonderful yummy, rose-colored concoction. 

4) Grab a fork and eat right out of the bag. 

From the reactions we got to the Walking Tacos, you'd think we had discovered fire. (Win.)

Dinnertime

My dear friend, Theresa of Sundrop Cottage (she is The Party Maven of Orange County) let me raid her storage area for all the fabulous and funky serving dishes, beverage dispensers, tubs, stands, covered glass cake stands, chalkboards, frames and every other wonderful party detail you see pictured in these photos. (Thank you, Theresa!)    

The Refreshments

It has been a long standing tradition at all of the parties we've ever had in the Darby home, to serve Real Ice-Cold Coca-Cola  ("it's the Real thing.") in the traditional glass bottles. They're made in Mexico with cane sugar instead of high fructose. You can totally taste the difference. 

We got cases and cases of Cokes. At the end of the night I think we had maybe two left. (Win.)

Amy-jonathan

Coca-cola

Jon-tori-nathan

For the non-Coke drinkers, we also had a tub full of mini cans of other soft drinks, Perrier, carafes of water, beverage dispensers with lemonade and iced tea. Also, instructions on how to make Arnold Palmers.

Drink-tub

Lemonade-and-iced-tea-drink-station

Arnold-palmers

The Sweets

Of course, we couldn't forget the desserts. To be honest, I debated making my pastelitos, but I was already cooking all the rest of the food, and besides Jonathan wanted donuts. So we got dozens of Krispy Kreme Donuts, elegantly displayed under glass. Jon was correct in his assessment that "his people are donut people." 

Donuts

But I got a little fixated on having mustache cookies. (Please don't even ask me why. I was planning so many details and I got a little crazy here. Shut up.) Except my sugar cookies don't ever turn out very well. What to do? 

I enlisted the help of my talented next door neighbor, genius baker, and mother of Tori, Debbie and her other daughter, Tessia to make the sugar cookie mustaches. Remember me practicing the "yes, thank you?" This was one of those moments. 

Mustache Sugar Cookies for the win. (Thanks, guys!)

Dessert-table

Mustache-cookies

All that was left was for me to make the signs. (You know, I excel at signage.)

Mustache-sign

Tessia made a simple chocolate fondue and the rest of the dessert table featured All The Things That Are Awesome When Dipped In Chocolate:

  • Wavy Lays Potato Chips
  • Pretzels
  • Rice Krispies Treats
  • Ritz Crackers
  • Marshmallows
  • Strawberries
  • Bananas

Rice-krispie-treats
 Here's the recipe from Hershey's Kitchens:

Chocolate Lover's Fondue

  • HERSHEY'S Semi-Sweet Chocolate Chips
  • 3/4 cup light cream or half & half
  • 1/2 cup sugar
  • Assorted Fondue Dippers

1, Combine chocolate chips, light cream and sugar in heavy medium sauce. Cook over low heat, stirring constantly, until chocolate chips are melted and mixture is hot.

2. Pour into fondue pot or chafing dish; serve warm. About 2 cups fondue.

The Photo Booth

We have the distinct privilege and pleasure to have, not one, but two talented photographers in our circle of friends. (All the photos that you see here are from them.) We decided it would work best to divide the picture taking between a photo booth and a roving photographer. (Seriously, I can't even believe I'm writing this. How lucky are we?) 

Rafael Guajardo (Tori's dad!) of Rafael Photography manned the Photo Booth.

Fezes-and-cokes

Jonathan, Nathan, and the girls next door, Tessia and Tori

While Dan Shalaby and his son, Cameron shot the candids. 

Photo-booth

The screen that was the backdrop for the photos is where the movie would later be shown.

Here I am with my dear friend and best neighbor, Debbie. This is pretty much the only proof that I was actually there at the party. I was mostly behind the scenes making sure there was food and everyone was happy. (Also, my curls were winning that night, but that's not important right now, either.)

Debbie-and-me

Here's Debbie with her husband, Rafael. How cute are they? 

Rafe-and-debbie

(The antique picture frame was also provided by Theresa at Sundrop Cottage. (Admit it - I have the coolest friends.)

The Surprise

Jonathan's girl, Amy, flew out from Texas to surprise him for his graduation party. You can tell by the look on Jon's face that he is indeed surprised. It took him a while to process that she really was here. We may or may not have had to re-start his heart from the shock. (Win.)

Jonathan-gets-a-surprise

The Music and Dancing

Lucy volunteered to be the DJ and our brother-in-law, Corey provided the speakers and microphone for this event. Let me just interject right here that all I had wanted originally was just a microphone to make "dinner is served," or "it's time to dance" type announcements. Corey took it up a notch with an amazing state-of-the-art sound system. (I know. Charmed life. Thanks, Corey!)

Lucy-as-dj

And Lucy entertained us all with her intelligent mix of current favorites and extremely danceable songs. She took us from hip-hop to Cuban (Benny Moré and Celia, of course) to swing (Glenn Miller). Once the dancing started, almost no one stayed in their seats.

Amy-cupid-shuffle

Amy Kikita was the one who instigated a lot of the craziness on the dance floor. Is anyone surprised by this?

Cuban-conga

A traditional Cuban conga goes from side to side, people. I just thought you should know.

Cupid-shuffle

 The guys donned their shades and totally got into One Direction, much to the delight of all the girls.

Guys-singing-one-direction

"You don't know you're beautiful..."

The dance floor was pretty much a blur from all the movement and happy sounds. (Also, can you tell this photo is from my iPhone? Not quite up to par with the quality of the others, is it? But look at how much fun they were having!)

Swing-dancing


Ymca-party-dancing

"It's fun to stay at the Y..."

The lights. The music. The happy chatter. The magical glow. I loved everything about this night.

Party-lights


The-party-lights

We wrapped the dancing up around 10:30 and moved all the chairs out to the far end of the yard (you can see the big screen up against the house). The kids grabbed blankets (it was a cool, but comfortable 66 degrees that night) and settled in for a showing of... what else? Ferris Bueller's Day Off. 

Outdoor-movie

I can safely say that a good time was had by all. 

All-the-party-people

My youngest, Jonathan has graduated high school and we celebrated in great style. I was so delighted with how everything turned out and how comfortable everyone was. I was grateful for all my friends who stepped up and helped turn our sketches into a reality. (High five, Debbie! We did it!) I feel like we honored our three graduates in a way that was perfectly fitting, surrounded by family and friends and their extended support networks.

Jon-nathan-tori

However, I neglected to to mention to those assembled that this was actually, in fact, my retirement party, but that's not important right now.  

Finding Joy

There has been so much preparation leading up to this week. Of course, I'm sure it's been like that in every home that celebrates Christmas. And also, did it seem like December just vanished in a puff of smoke, or is that just me?

We're not the people who put up Christmas decorations the day after Thanksgiving. We take our time and savor December. We slowly add decorations and touches as the month progresses. It makes it all feel so much more magical to me. I never want Christmas to be a thing that needs to just "get done." *shudder*

I was very deliberate this year about slowing down and taking care of myself and my family. I was determined to find joy in everything we did this year. Can I just tell you - slowing down is hard! Especially when the rest of the world is in full go! mode.

In fact, for about the first two weeks of December, all I had was this Merry Christmas pillow, which makes me totally happy, but that's not important right now.

Merry Christmas pillow

This month I did manage to design, print and send out invitations to Nochebuena early in the month.

Be our guest

I've got 32 people coming on the 24th and there won't be any room for a Christmas tree, so I got a few smaller trees and put them in corners of our living room. So really, it's more like setting the stage than Christmas decorating.

Mini christmas tree

I was happy we took our family photos back in September for our Christmas card. I don't know that we would have managed to get all of us in one area code otherwise. (See the photo in my blog header at the top of this page.)

Merry christmas

Christmas around here happened slowly, deliberately. We took the time to watch Christmas movies and celebrated as we made Crema de Vie for our friends.

Crema de vie

We got up early before the rest of the world and had coffee and shared dreams.

Coffee

We went to parties and shared our food.

Picadillo pies

And we shopped a little. Mostly online. We made lists and shared ideas. And slowly added design elements to our "set."

Christmas hutch

I even got inspired (Thank you, Pinterest!) and made word garlands using my new Silhouette Portrait. (Still not done. I have a bunch more to hang today and tomorrow.)

Christmas garlands

What I have found is this: That I find no joy in perfection and in hurry. Perfection and hurry are way too demanding for me. But, without the tyranny of having to have everything up in one day, (who tapped, anyway?) I find that I'm enjoying the holidays more. There seems to be much more time for the fun and the celebration and all this makes me a nicer person.

We took time to really celebrate Advent and the coming of our Savior on Christmas day. And that just added to my personal joy. Seriously. There's something to be said for anticipation and preparation. It's as God intended.

After all the slow decorating and the taking time to enjoy the season, it turns out that my house is looking pretty darn festive for Nochebuena and Christmas. Now it's time to start preparing food and wrapping gifts. And I'm not stressed about this at all, because I took the time to take care of myself this season.

I found joy right on my doorstep. Who knew?

Joy

Feliz Navidad, my friends!

A Cuban Poster & Your Own Custom Subway Art!

I have often described myself as a Lover of Words. Just as often, I self-describe as a Lover of Cuban Food. Also, I'm a Serial List Maker.

Just recently, all those worlds collided in my creative brain and the resulting explosion was this Cuban poster...

Cuban poster: Comida cubana subway art

Words + Cuban Food = Comida Cubana to create a subway style Cuban poster! I know. The whole thing kind of blows your mind, right? The finished poster is 20" x 30" and it's quite suitable for framing. (Note: The red water mark at the bottom is not on the finished poster.)

And, yes, I made it myself. *insert self-congratulations here*

I'm selling this beauty for just $38 + shipping & handling.

If you're interested in a more unique one-of-a-kind gift, consider a custom subway art piece, like the following.

I made this one for my husband, Eric. These are his very favorite surf spots in California. Pretty sweet, no? I just casually asked him "So, Honey... what are your favorite surf spots?" and I made this piece with the information he gave me. It hangs at the top of the stairs in our home and he totally loves me for it. (Win!)

Surf spots subway art

A friend and her husband recently celebrated their 37th wedding anniversary and I created this one based on words and places that are meaningful to the two of them. I especially love the map coordinates at the top which signified a place where they used to meet when they were courting. Don't you love it?

Anniversary subway art

This is a gift from one sister to another. It doesn't make much sense to me, but really, that's the point. I'm particularly curious about the stealing rhubarb line, but that's not important right now. She also mentioned to me that their mom had a thing for owls, so I created one and included it in the finished piece. They both fell in love with it.

Sisters subway art

If you'd like a custom subway art poster created by me, especially for you, with your own special words, I charge $87. plus shipping & handling.

It works like this:

1) The Design. You come up with about 12 -15 personal words or phrases that represent that special thing, event, anniversary, relationship, etc.

For example:

  • Your favorite places to vacation.
  • The things you love to do together.
  • The pet names you have for each other.
  • The addresses of all the places you've lived in your life.
  • Your family's favorite things.
  • Special places you visit regularly.
  • All the birthdays and anniversaries in your family. (Numbers add an especially compelling look and feel to the design.)
  • The possibilities are endless!

2) Payment. I prefer to be paid via Paypal. It's the best and most secure way for both of us. There's a "notes" box in the payment form where you can type in your special words for the art.

3) The Comp. I will come up with a creative way of putting those words together  - it's kind of like a puzzle - and email you a comp. Comp is design talk for "a preview of what the finished thing will look like."

3) Your One-of-a-Kind Subway Art by Marta Original. I'll ship the finished 20" x 30" custom poster, suitable for framing in a mailing tube to the address of your choice in the U.S. only. (Sorry, rest of the world.)So, what are you waiting for?

Comida Cubana Subway Style Cuban Poster by Marta - $38.00 (+shipping & handling)

Choose Quantity


Custom One-of-a-Kind Subway Art by Marta - With the words of YOUR CHOICE. - $87.00 (+shipping & handling)

JUST ADDED! 7/24/2014. A new, smaller Comida Cubana 16"x20"  size Cuban poster. Doesn't it look cool in my kitchen? $24.00 (+shipping & handling). Order below.

Comida-cubana-subway-art

Choose Quantity


The Cuban Hipster Thanksgiving

When I host family or friends for a big, elaborate dinner, my delight is in designing the tablescapes.

My job, as I see it, is to create a warm and welcoming atmosphere, but not get too hung up on making things so department-store-perfect that it feels too cold and impersonal. It's fun for me to set a pretty table. It's much more fun to make the people who come into my home feel that they are truly welcome.

Originally, I wanted real chalkboard tablecloths so that we could write on them or play tic-tac-toe or whatever. My daughter, Amy Kikita and I spent a good long time on Pinterest, getting ideas and pinning inspiration. (If you're on Pinterest and you're not already following me, you totally should! Here's my link.)

We found that a roll of chalkboard cloth was a bit too pricey, so we attempted to paint sections of kraft paper with chalkboard paint. The result was not at all satisfying.

I ended up going with a 50 foot roll of black, glossy paper that I found at Hobby Lobby that we then cut and pieced together to cover the tables. We used Simply Tacky to hold them in place.

(Note: They just opened a Hobby Lobby in our area code recently and I am super inspired every time I go in there. They have everything! Who knew?)

Chalkboard settings

I was originally going to tag the glasses with each person's name because it's super important to me that everyone has their place at the table, so place cards are always at the top of my list. Amy suggested we just paint "plate circles" and write their names right on the chalkboard tablecloth paper. Genius.

Chalkboard table

I used one of my plates as a guide and just drew a circle at each place, then wrote in the person's name in the center. I used White Chalk Markers which dried quickly and looked really fun and friendly. So here we were on our way to the most Hipstery Thanksgiving ever.

Chalkboard table settings

I didn't worry too much about making the circles perfect, as you can see.

On each table for the centerpieces, I put the silverware and napkins in caddies and dropped the forks, knives, and spoons in mason jars with tags to finish off the cool look.

Succulents & silverware

I had 32 people here. THIRTY-TWO. Of course, we had to move furniture to fit them all into our freakishly small cottage-sized home.

Napkin and silverware caddie

I had three tables set. One was our regular dining table which seats six. The second was actually created by putting two eight foot long tables together which seated fourteen. (We had to move furniture out of our living room to do this, but that's not important right now. Did I mention my house was freakishly small?) And my beautiful farm table, which lives outside on the patio, seated twelve. The kids were seated alongside the adults. No kids table for them this time.

Farm table

I added some succulents in baskets next to the caddies. And added a gratitude quote in a decorative mini picture frame. We cut some branches from the green belt across the street and added those for color and texture. So hipster, no?

Succulent centerpiece 2

We set out the tall altar candles (I picked them up at our local Target store). We put the napkins in tin buckets and tea lights in mini mason jars and tin cans. Tin cans, people! I actually washed out tin cans to use on my table!

I was worried my mother was going to have a stroke when she saw this whole set up, but she was delighted and amazed at how elegant the whole thing looked in spite of the simple (read "barbarian") touches. (Win!)

Succulent centerpiece

There were two (!) turkeys and lots of delicious sides and plenty of desserts. I opted for just a plain white cloth for the food table and made the chalkboard menu board the focal point to keep with my chalkboard theme.

Thanksgiving menu

My family came early and stayed late. And there was sooo much food left over, as there always is. We Cubans are "exajerados" when it comes to food, am I right? (I'm right.)

So, I had made sure everyone was able to take home some leftovers. I ordered the take out boxes from an online supply place and added chalk tags.

Leftover boxes

 The consensus was that a good time was had by all. Even the not-so-hipsters.

The family

Give Thanks. I mean it.

I'm preparing to host Thanksgiving again this year. Of course, everyone's invited.

I love traditions. But what I love more is making them my own.

I had a vision. I wanted to hang a giant banner that read, "Give Thanks" that would be the first thing you saw when you walked into our freakishly small cottage-like home.

I tried to enlist all the kids to help, but Lucy was busy and Jon was going out and wait a second...when did they get to be "that" age? *sigh*

But my daughter, Amy Kikita was available and willing, but she had one small problem.

"I hate banners, Mom."

Me: "Shut up. I know. We're going to paint the letters and it's going to be fantastic." (Of course, what I meant by "we" was "I really want you to do this, because I have a dozen other things to do," but that's not important right now.)

She was totally on board with the whole painting-the-letters thing, which was awesome.

We bought the wooden letters at the local Hobby Lobby. They're about 9 inches tall. We chose a copper metallic paint because that way it would catch the light a little.

It was a cold day, so after we painted each letter, we set them outside to dry.We spent the day painting and chatting and catching up with life and admiring our work.

Amy painting letters

At one point, she exclaimed, "Mom, you don't have the right letters!"

Wait, what?

Give

Not. Funny.

(Okay, maybe a little bit funny...)

Once the letters were dry, we used our trusty Never-Ending Twine® and attached the letters with staples on the back. Almost immediately we hit a glitch.

Give banner

Shut up. It's not as easy as it looks, okay?

The final signage weighs about 4 lbs. and is about 10 feet across. And it looks spectacular.

Give thanks

I love it so much. I may just leave it up for most of the year. Because, I don't know about you, but I need to be reminded that Giving Thanks should really be, not just an every November occurence, but a good habit to practice every single day.

Thanks, Amy. From the bottom of my heart.

Everyone's Invited

Everyone knows that Thanksgiving lands on the 4th Thursday of November. So, it's not like it's a big surprise that Thanksgiving this year will be celebrated on the....4th Thursday of November.

This happens every single year. 4th Thursday = Thanksgiving. We have already discussed and decided that the Thanksgiving celebration will take place at our home this year. Again.

And yet, my family needs wants really likes to receive formal Thanksgiving invitations. Which is fine because I'm happy to do it and it's a key part of our family Thanksgiving tradition. Because I'm only inviting family (with a couple of close friends) I don't need to add the address or an RSVP. (Also, my people are on Cuban time. That means they'll just start arriving around 5pm, but that's not important right now.)

Darby Thanksgiving invitations 2013

I kind of like this quirk about my family. It's not a big thing, but it's ours. And isn't that what makes us cherish our traditions? I have 32 coming this year, so I'll be spending the next few days moving furniture and "set designing" our Thanksgiving to make sure everyone's got a place.

I think it's important for everyone to feel welcome and to have a place. Don't you?

{Full disclosure: I took an online class from Carina Gardner to learn how to do the digital chalkboard look. The fonts I used for the invitation are: Handy George, Pointedly Mad, Bergamot Ornaments, Road Movie, Return to Sender, Housegrind, KG Skinny Latte - all can be found on dafont.com.}

Styling a Quick and Easy DIY Thanksgiving

I love a beautifully set table. I do.

It doesn't have to be fancy or elegant, although it could be. My preference is for fun and welcoming. Here are some examples of Thanksgiving tables that I've done in the past here, here, and here.

Today I want to share how I went about styling my Thanksgiving tables last year. So, buckle in and welcome to my creative process! I was so pleased with how everything turned out that I may just have to trademark some of these elements. (Okay, not really. But a girl can dream...)

First of all, I have to tell you that I pretty much hate decorating with turkeys. Now you know. Turkeys don't make me happy. At all. And even though sometimes I love cheesy stuff, I have to tell you that I draw the line with turkeys as decorative items. Unless, of course, it's a vintage thing, or they're used ironically. Now you know.

Last year we were on a time crunch. It felt like November had gotten away from us completely. Or maybe that happens to me every year. (No way! Is it the 12th already? Wait, what?) Or maybe I truly do like the pressure of the last minute hustle? Probably. But that's a therapy session blog post for another day.

Back to Thanksgiving...

Thanksgiving tables

I found myself 2 days before that moment when I was going to be hosting 28 people in my freakishly small cottage-like home for Thanksgiving dinner and nothing planned, except for the food, of course, which is technically the same every year, which makes it a no-brainer and therefore not a part of today's story.

So I did what anyone else would have done in my shoes... I procrastinated. I surfed the web. Before you judge, just know that this is when I found my salvation in Tomkat Studio free downloadable Thanksgiving Printables. I was so inspired.

{Disclaimer: Tomkat is not sponsoring this post or paying me in any way to promote them. I was just truly inspired and I wanted to share how I put together their designs with my own.}

I downloaded the banner letters and stapled them over a string of sturdy twine. Yes, stapled. I know. In design world we call that "quick and dirty." (Don't judge). Everyone thought it was adorable and you couldn't even see the staples, so I'm calling that a win.

Thanksgiving tables 2

Let's talk about the twine for a moment. Somehow, somewhere, we got a giant spool of this stuff. We have used it for years and years in all kinds of projects and plays and there's still miles more. Seriously this spool thingy is like the size of a football. It's like the loaves and fishes of twine. There's always plenty and it never, ever runs out. Which is a big plus because I'm a banner-making fool.

Check out my banner-love (with my Never-ending Twine, of course) here and here and here.

Twine for all occasions!

Behold the Never-Ending Twine of the Darbys®.

Giant twine thing

Also, we got those tall votive-type candles at the local Mexican mercado. The ones that are used for "santos" and altars, but with no colorful saint on them. They're just plain, unscented candles in a jar. Also, I found them at Target (plus they're really cheap) recently, so there you go.

We (when I say "we," I mean Lucy) wrapped the twine around the bottom of the pillar candles to dress them up a bit. We (when I say "we," I mean all of us) were delighted with the effect.

We found some big, fat candles at Target and wrapped some of the Never-ending Twine around them and attached a tag.

Wrapped candle

I made some tags that said "Give Thanks," which I printed on a nice light cream linen paper with my inkjet printer. I wanted a little bit of height on the table for the candle centerpiece so I wrapped up some of my cookbooks, which were different and interesting sizes, in brown wrapping paper. I know it sounds a little lazy, but the effect was quite simple and lovely, I think.

Thanksgiving table place setting

Thanksgiving centerpieces rustic

The candles, I felt would add a touch of elegance and warmth to the room.

I have a lot of glass candle holders and little mason jars and that sort of thing, because we always have parties, so we brought out everything glass we could find and I put tealight candles in everything and threw it all together.

The white table cloth and the burlap runners helped to anchor everything into a pleasing neutral palet. The burlap and twine kept it rustic. The fancy typeface on the tags added an old world look.

I printed out the menu on the same cream linen and put it into a white frame with a fat white mat on the food table.

Thanksgiving menuThanksgiving menu 12

My most favorite detail of all was the walnut placecard holders. I had Eric drill a slice into the walnuts. The trick is not to cut where they naturally open. You set the walnut down and let it "tell" you where it wants to sit. (I find this trick works well with teenagers, too, but that's not important right now.)

Thanksgiving table placecards

The placecards were different and cute without being obtrusive. I was quite delighted by the whole thing.

Thanksgiving table

Feel free to steal borrow any of these Thanksgiving decorating ideas. Here are the links for the stuff I used...

The font I used is called Some Weatz and you can download it for free from dafont.com.

The old-school cutlery graphic is from The Graphics Fairy.

Thanksgiving placecard design
I'm happy to report that our quick and dirty easy DIY Thanksgiving decorations were a huge hit. Now I'm much more inspired to start the design process earlier. No way! Is it the 12th already? Wait, what?   *sigh*

The Things I Say

My dear friend, Jana has embarked upon an ambitious project. She is quite the accomplished hand lettering artist. Each day she chooses a thought, or  a recipe, or a quote and works it into a beautiful piece of art and she's determined to do this for 333 days. 

I love visiting her portfolio site, janaleemiller.com. It always makes me happy.

Because she is my friend, and I'm a chatty and noisy Cuban, she constantly has to listen to me spout off my "Marta-isms." What's cool about Jana is that she doesn't just listen, she takes what I say and turns it into a cool piece of art.

Like the other day, when I blogged about my daughter building me the Farmhouse Table. I wrote a self-quote at the bottom of the post:

“If you build it, I will cook. A lot.” ~Marta Darby

And I posted this on Instagram:

If you build I will cook

Jana turned it into this:

If you build it

Don't you wish you had talented and artsy friends like me? (Also, I'm sooo framing this!)

Thank you, my friend.

Please visit Jana and her designs at janaleemiller.com. Leave her lots of comments and feedback. She'll like that.